Building a Twitter Clone with Dgraph and React
Graph databases like Dgraph provide fast and efficient data querying, even across complex, hierarchical data. This capability offers significant advantages over more traditional relational databases, as data creation is not enforced by a rigid schema, and data retrieval is as dynamic and fluid as your application requires. Dgraph expands on these capabilities by providing out-of-the-box horizontally-distributed scaling via sharded storage and query processing, combining the flexibility of the graph databases with unprecedented speed.
While having that much power at your disposal is all well and good, it can be difficult to grasp how many modern applications might integrate with and use a graph database like Dgraph. In this series, we’ll explore a real-world Twitter clone application that was created entirely around its integration with Dgraph. Throughout this guide, you’ll see how the dgraph-twitter-clone is designed and structured to work with Dgraph and produce an end product that mimics Twitter while having access to the powerful data manipulation capabilities provided by Dgraph. Whether performing queries and transactions directly with the Dgraph server or performing tasks indirectly through an API middleware, the dgraph-twitter-clone app illustrates how a modern JavaScript app can take full advantage of Dgraph and the GraphQL+- query language.
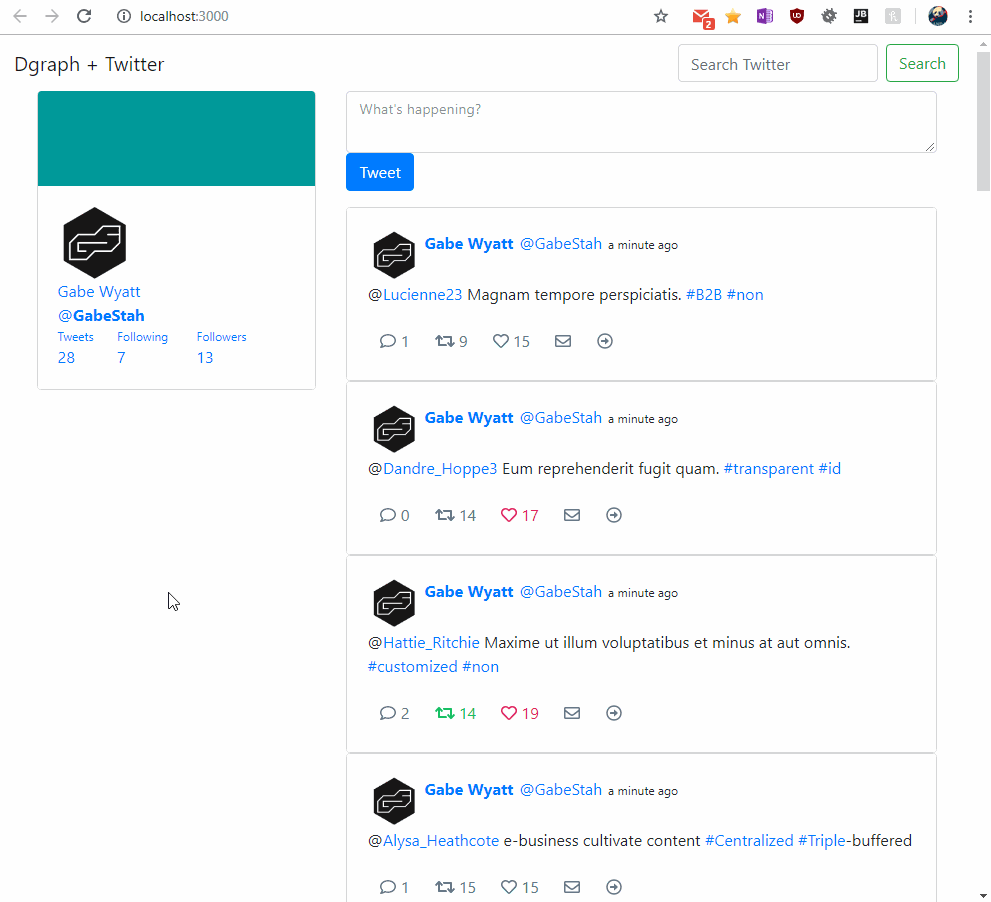
You’re encouraged to install from the repository and play with the application code yourself or feel free to just read and follow along with the guide as we walk through the major features and structure of this app and how it utilizes Dgraph to create a Twitter-like single page application. Below is a short animation showing the client application we’ve created. Let’s get into it!
Getting Started
Prerequisites
This guide provides a step-by-step walkthrough of a Twitter clone application created using the power of a Dgraph data layer. It uses React for the front-end client application. However, before we begin, there are a handful of prerequisites to install or simply to be aware of.
Installing Dgraph
You’ll need the Dgraph cluster installed, either locally or via an accessible Docker container. This entire application was created while running Dgraph on Docker, which can be installed using the Docker Compose file found here. Alternatively, feel free to install Dgraph in whatever manner best suits your needs. Check out the official documentation for more details.
Installing Node
The Dgraph Twitter Clone app relies heavily on Node.js, so you’ll also need Node locally installed. Visit the official site to download the correct version for your OS.
Using TypeScript
All the code throughout the dgraph-twitter-clone project is written with TypeScript, which is a superset of plain JavaScript that provides typing and other quality of life features for creating cleaner code. While you won’t need to be particularly familiar with TypeScript to follow along with this tutorial, be aware that some of the code syntax used throughout the series is TypeScript-specific. Ultimately, all TypeScript code is converted into normal JavaScript prior to execution, so there’s nothing in this guide that couldn’t have been created in plain JavaScript at the outset.
Application Architecture
Before we dig into the code let’s take a moment to define what the goal of our application is and roughly how it’s structured to accomplish that goal. This application aims to illustrate how Dgraph can simplify the structure and lower the development time of a real-world application. While this application is just a proof of concept and far from production-ready software, the overall goal of the dgraph-twitter-clone is to create a solid foundation for a Twitter-like front-end application that is powered by Dgraph.
Furthermore, since graph databases are not as well-known as relational databases, the secondary goal of our app is to provide some keystone familiarity for those readers coming from a relational database background. The app illustrates how a “traditional” relational database might handle the app data, while then taking it a step further and showing how that data can be more easily queried and manipulated with a graph database like Dgraph. The following are a few key components we’ve used to accomplish those goals and to build a functional Twitter clone application.
Models
As you’re undoubtedly aware, Twitter’s functionality largely revolves around just two simple pieces of data: Tweets and Users. A user has something to say, so they create a tweet, publishing it for other users to consume. Additionally, Hashtags are also a fundamental piece of Twitter data, even though they are considered secondary citizens to the parent tweet element. Therefore, this application has a model to represent those three critical pieces of information.
Dgraph Adapter
We need to manipulate data on our Dgraph server. Dgraph’s official dgraph-js-http package provides a useful API for HTTP-based transactions and mutations. Our application uses dgraph-js-http, but we’ve also added a simple adapter that helps to transform our model data into a format Dgraph understands.
GraphQL+-
Dgraph’s GraphQL+- query language was developed to bring much of the power of Facebook’s popular GraphQL to graph databases, while simultaneously adding features that better suit the specific needs of graph databases. A fundamental component of GraphQL+- is the query. Queries for Dgraph are used to retrieve and manipulate data, just like queries in relational databases.
For example, the following query uses the eq function to find all nodes with a user.screenName equal to GabeStah.
{
  user(func: eq(user.screenName, "GabeStah"))
  {
    uid
    user.screenName
    count(user.friends)
    user.description
  }
}curl http://127.0.0.1:8080/query -XPOST -d '
{
user(func: eq(user.screenName, "GabeStah"))
{
uid
user.screenName
count(user.friends)
user.description
}
}' | python -m json.tool | less
package main

import (
  "context"
  "flag"
  "fmt"
  "log"
  "github.com/dgraph-io/dgraph/client"
  "github.com/dgraph-io/dgraph/protos/api"
  "google.golang.org/grpc"
)

var (
  dgraph = flag.String("d", "127.0.0.1:9080", "Dgraph server address")
)

func main() {
  flag.Parse()
  conn, err := grpc.Dial(*dgraph, grpc.WithInsecure())
  if err != nil {
    log.Fatal(err)
  }
  defer conn.Close()


  dg := client.NewDgraphClient(api.NewDgraphClient(conn))


  resp, err := dg.NewTxn().Query(context.Background(), `blahblah`)

  if err != nil {
    log.Fatal(err)
  }
  fmt.Printf("Response: %s\n", resp.Json)
}Since our query specifies exactly the data we want to return, we only retrieve the unique identifier, screen name, friends count, and description of the user. The returned data should look something like the following.
{
  "data": {
    "user": [
      {
        "uid": "0x19",
        "user.screenName": "GabeStah",
        "count(user.friends)": 7,
        "user.description": "At consequatur eos dolores adipisci omnis. Molestiae facere delectus quaerat ratione velit temporibus. Enim eligendi tempora provident accusamus laboriosam. Dolores saepe natus est qui velit sapiente non odit cupiditate. Soluta sint quos minima voluptatem voluptas odio rerum rerum. Blanditiis dicta placeat vitae aut doloribus."
      }
    ]
  }
}
Front-end React Client
Our app also has a front-end site that loosely emulates Twitter. For this project, we’ve used the React JavaScript library to create our Twitter clone single-page application. You don’t need any prior React experience to follow along with this tutorial, but we’ve also taken advantage of the new React Hooks feature introduced to React in early 2019, so you’ll be able to learn a bit about how those work.
Since our Twitter clone app is primarily focused on how Dgraph and graph databases can be used for a Twitter-esque application, the front-end portion is rather limited in scope – we have just enough there to lay the groundwork and show how it all integrates together.
Back-end Express API
To help illustrate how a relational database typically handles Twitter-like data we’ve also added a simple API to our application. In fact, as you’ll soon see, we’ve created an app that can transition between using REST API endpoints and GraphQL+- queries with the flip of a configuration flag.
We’ve taken it one step further and allowed our API to act as a middleware between the front-end client and Dgraph. This will help illustrate how a real-world application might gain a tremendous benefit from exposing simple endpoints to users or other applications, while simultaneously querying and manipulating the underlying data within a graph database like Dgraph.
With all the basic components planned out let’s just right into the code for our dgraph-twitter-clone application!
Installing the App Locally
The dgraph-twitter-clone application can be installed and configured in just a few steps. This will allow you to see the app in action and start tinkering with the code yourself so you’ll get an idea of how easy it is to power modern applications with Dgraph.
Starting by cloning the
dgraph-twitter-cloneGit repository to a local directory.$ git clone https://github.com/GabeStah/dgraph-twitter-clone.git $ cd dgraph-twitter-cloneMake sure Dgraph Alpha is installed and running (see the Prerequisites). By default the Dgraph Alpha server is available at
localhost:8080, but if you changed this endpoint during your installation, you’ll need to update the configuration to match your setup. To do so open thepackages/dgraph-query-manager/src/config/development.tsfile and change thedgraph.adapter.addressto your Dgraph Alpha server endpoint.// File: packages/dgraph-query-manager/src/config/development.ts const development = { dgraph: { adapter: { address: 'http://localhost:8080', }, }, };Now to perform a full build simply run the
yarn run buildcommand from thedgraph-twitter-cloneroot directory.Warning Theyarn run buildcommand will drop all existing data from your Dgraph database. If you prefer to keep your existing Dgraph data, please run theyarn run build:safecommand instead, which will not drop data, and will only add additional schema and data.$ yarn run buildThis command will install a few global Node packages (
gulp-cliandyalc), install all required local Node packages for the API and Client apps, transpile TypeScript source files into executable CommonJS, connect to Dgraph, add the new schema, and finally generate the initial dummy data used by thedgraph-twitter-cloneapp. This process will take a couple of minutes and may appear to hang during thedb:generatestep, but the output should look something like the following.yarn run v1.13.0 $ yarn global add gulp-cli yalc && yarn install && gulp install [1/4] Resolving packages... [2/4] Fetching packages... [3/4] Linking dependencies... [4/4] Building fresh packages... success Installed "gulp-cli@2.1.0" with binaries: - gulp success Installed "yalc@1.0.0-pre.27" with binaries: - yalc [1/4] Resolving packages... [2/4] Fetching packages... info fsevents@1.2.7: The platform "linux" is incompatible with this module. info "fsevents@1.2.7" is an optional dependency and failed compatibility check. Excluding it from installation. [3/4] Linking dependencies... [4/4] Building fresh packages... [16:54:29] Requiring external module @babel/register [16:54:30] Using gulpfile ~/projects/dgraph-twitter-clone/gulpfile.babel.js [16:33:13] Starting 'install'... [16:33:13] Starting 'api:yarn:install'... [16:33:19] Finished 'api:yarn:install' after 5.84 s [16:33:19] Starting 'client:yarn:install'... [16:33:29] Finished 'client:yarn:install' after 9.88 s [16:33:29] Starting 'packages:publish'... [16:33:29] Starting 'packages:remove:modules'... [16:33:29] Starting 'cleanupPackageDirectories'... [16:33:29] Finished 'cleanupPackageDirectories' after 5.92 ms [16:33:29] Finished 'packages:remove:modules' after 6.32 ms [16:33:29] Starting 'packages:install:modules'... [16:33:29] Starting 'installPackageModules'... [16:33:31] Finished 'installPackageModules' after 2.87 s [16:33:31] Finished 'packages:install:modules' after 2.87 s [16:33:31] Starting 'packages:build'... [16:33:31] Starting 'buildPackage'... [16:33:33] Finished 'buildPackage' after 1.76 s [16:33:33] Starting 'bumpVersion'... [16:33:33] Bumped 0.6.175 to 0.6.176 with type: patch [16:33:33] Finished 'bumpVersion' after 6.76 ms [16:33:33] Starting 'publishToYalc'... [16:33:33] Finished 'publishToYalc' after 251 ms [16:33:33] Finished 'packages:build' after 2.02 s [16:33:33] Starting 'packages:push'... [16:33:33] Starting 'pushPackagesToApi'... [16:33:34] Finished 'pushPackagesToApi' after 154 ms [16:33:34] Starting 'pushPackagesToClient'... [16:33:34] Finished 'pushPackagesToClient' after 192 ms [16:33:34] Finished 'packages:push' after 347 ms [16:33:34] Finished 'packages:publish' after 5.24 s [16:33:34] Starting 'api:transpile'... [16:33:38] Finished 'api:transpile' after 4.11 s [16:33:38] Starting 'db:regenerate'... [16:35:08] Finished 'db:regenerate' after 1.5 min [16:35:08] Finished 'install' after 1.92 min Done in 117.21s.Tip The Yalc package provides us the ability to install local node package dependencies without the need to publish them to the public NPM repo. We use Yalc to make local project copies of the DgraphQueryManager package, which is particularly useful within the client application. Since the client is based on acreate-react-appconfiguration it cannot access Node packages outside of the project directory, so Yalc helps to get around this limitation.With everything installed you can now run the Client and/or API apps with
yarn run start.$ yarn run start yarn run v1.13.0 $ gulp start [16:57:04] Requiring external module @babel/register [16:57:04] Using gulpfile ~/projects/dgraph-twitter-clone/gulpfile.babel.js [16:57:04] Starting 'start'... [16:57:04] Starting 'api:start'... [16:57:04] Starting 'client:start'...The React client should open in a new browser tab automatically. If not, manually browse to the client app at
http://localhost:3000.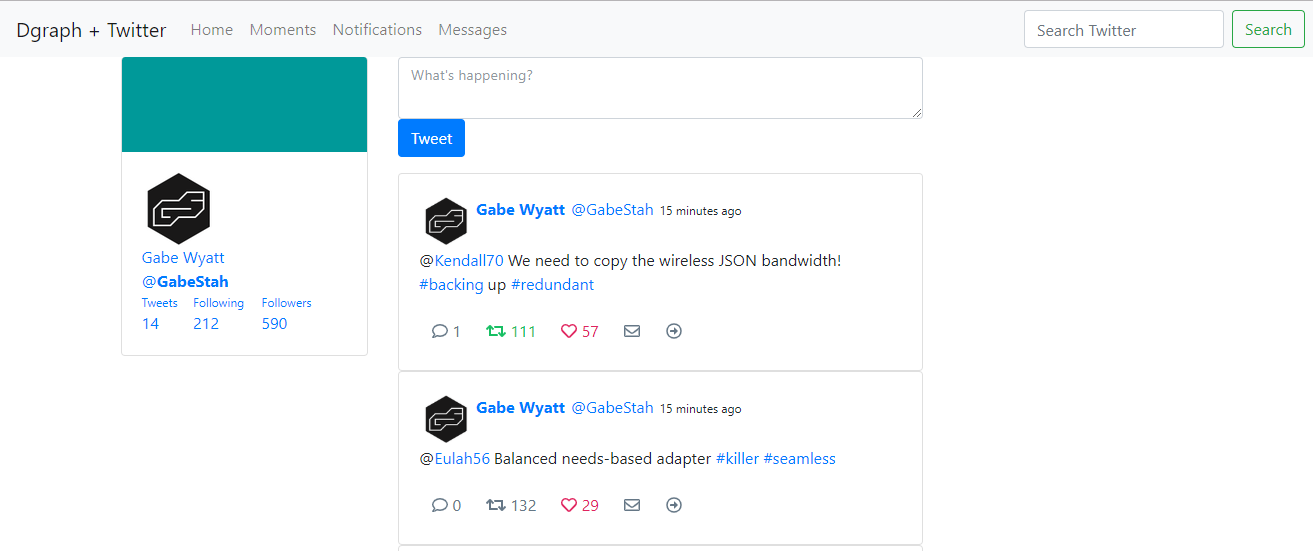 Tip Throughout this tutorial the packaging tool
yarnwill be referenced and used. This is just my personal preference, so you are free to substitutenpmcommands in place ofyarncommands and everything will function the same.The API should also be running at
localhost:5000. You can access it via an endpoint such aslocalhost:5000/api/tweets/10:$ curl localhost:5000/api/tweets/10 | jq { "statusCode": 200, "success": true, "uri": "", "message": "tweets found.", "request": "query find($count: int = 10) {\n data(func: has (tweet.text), first: $count) {\n uid\n expand(_all_) {\n uid\n expand(_all_)\n }\n }\n }", "response": [ { "uid": "0x30ca9", "tweet.createdAt": "2019-04-29T14:35:14.799Z", "tweet.isQuoteStatus": false, "tweet.user": [ { "uid": "0x30c99", "user.createdAt": "2019-04-29T14:35:14.409Z", "user.location": "Schummville, Marshall Islands", "user.email": "Desiree_Altenwerth55@example.net", "user.screenName": "Jedidiah7", "user.name": "Heber Roberts", "user.url": "https://kieran.biz", "user.avatar": "https://s3.amazonaws.com/uifaces/faces/twitter/gonzalorobaina/128.jpg", "user.description": "Dolorem debitis sunt. Qui praesentium est optio tenetur. Maxime voluptas accusamus debitis. Hic quod cum est voluptas qui harum." } ], "tweet.text": "@Marilou_Bins28 The EXE protocol is down, transmit the bluetooth bandwidth so we can transmit the EXE capacitor! #parsing #haptic", "tweet.hashtag": [ { "uid": "0x30ca7", "hashtag.indices": [ 113, 121 ], "hashtag.hashtag": "parsing" }, { "uid": "0x30ca8", "hashtag.indices": [ 122, 129 ], "hashtag.hashtag": "haptic" } ], "~user.favorites": [ { "uid": "0x30c75", "user.name": "Norbert Hirthe", "user.url": "https://pink.biz", "user.avatar": "https://s3.amazonaws.com/uifaces/faces/twitter/tobysaxon/128.jpg", "user.description": "Ipsam ut inventore qui. Officia rem ipsa. Quasi quae consectetur sit libero possimus exercitationem.", "user.location": "Arleneland, Holy See (Vatican City State)", "user.screenName": "Cletus_Hilpert", "user.createdAt": "2019-04-29T14:35:13.393Z", "user.email": "Nina_Lynch98@example.com" }, ], "~user.retweets": [ { "uid": "0x30c7b", "user.location": "O'Connellport, Bhutan", "user.name": "William Zemlak", "user.url": "http://gerson.org", "user.createdAt": "2019-04-29T14:35:13.565Z", "user.avatar": "https://s3.amazonaws.com/uifaces/faces/twitter/shvelo96/128.jpg", "user.description": "Alias expedita fugiat harum. Sapiente eum quisquam velit consectetur enim temporibus. Dolorum explicabo eius sequi voluptas repellendus ea rerum et. Sunt nihil rerum necessitatibus occaecati natus aut qui.", "user.email": "Brett_Oberbrunner79@example.org", "user.screenName": "Cierra65" } ] }, ] }Better yet, you can skip the API and access Dgraph directly. Running the following query will return the same results as the API endpoint above.
{ data(func: has (tweet.text), first: 10) { uid expand(_all_) { uid expand(_all_) } } }curl http://127.0.0.1:8080/query -XPOST -d '
{ data(func: has (tweet.text), first: 10) { uid expand(_all_) { uid expand(_all_) } } } ' | python -m json.tool | lesspackage main import ( "context" "flag" "fmt" "log" "github.com/dgraph-io/dgraph/client" "github.com/dgraph-io/dgraph/protos/api" "google.golang.org/grpc" ) var ( dgraph = flag.String("d", "127.0.0.1:9080", "Dgraph server address") ) func main() { flag.Parse() conn, err := grpc.Dial(*dgraph, grpc.WithInsecure()) if err != nil { log.Fatal(err) } defer conn.Close() dg := client.NewDgraphClient(api.NewDgraphClient(conn)) resp, err := dg.NewTxn().Query(context.Background(), `blahblah`) if err != nil { log.Fatal(err) } fmt.Printf("Response: %s\n", resp.Json) }Tip This tutorial will feature many executable Dgraph query snippets similar to the above. If your Dgraph Alpha server is running at the default location (localhost:8080) and you installed the schema for thedgraph-twitter-cloneyou can execute these runnable queries in the browser and receive output from your own Dgraph installation. If your installation is running elsewhere, feel free to manually adjust the endpoint field in the runnable dialog box to send the query to that location.
Creating the Schema
Before we dive into the code let’s briefly look at the schema our Twitter app is using. As discussed, we’re working with tweets, users, and hashtags, so we cover all three primary elements in the full schema found below.
hashtag.indices: [int] .
hashtag.hashtag: string @index(exact, fulltext) @count .
tweet.createdAt: dateTime @index(hour) .
tweet.hashtag: uid @count @reverse .
tweet.inReplyToStatusId: uid @count .
tweet.inReplyToUserId: uid @count .
tweet.isQuoteStatus: bool .
tweet.quotedStatus: uid @count .
tweet.text: string @index(fulltext) @count @upsert .
tweet.user: uid @count @reverse .
user.avatar: string .
user.createdAt: dateTime @index(hour) .
user.description: string @index(fulltext) @count .
user.email: string @index(exact) @upsert .
user.favorites: uid @count @reverse .
user.friends: uid @count @reverse .
user.location: string @index(term) @count .
user.name: string @index(hash) @count .
user.retweets: uid @count @reverse .
user.screenName: string @index(term) @count .
user.url: string @index(exact, fulltext) @count .curl http://127.0.0.1:8080/alter -XPOST -d '
hashtag.indices: [int] .
hashtag.hashtag: string @index(exact, fulltext) @count .
tweet.createdAt: dateTime @index(hour) .
tweet.hashtag: uid @count @reverse .
tweet.inReplyToStatusId: uid @count .
tweet.inReplyToUserId: uid @count .
tweet.isQuoteStatus: bool .
tweet.quotedStatus: uid @count .
tweet.text: string @index(fulltext) @count @upsert .
tweet.user: uid @count @reverse .
user.avatar: string .
user.createdAt: dateTime @index(hour) .
user.description: string @index(fulltext) @count .
user.email: string @index(exact) @upsert .
user.favorites: uid @count @reverse .
user.friends: uid @count @reverse .
user.location: string @index(term) @count .
user.name: string @index(hash) @count .
user.retweets: uid @count @reverse .
user.screenName: string @index(term) @count .
user.url: string @index(exact, fulltext) @count .' | python -m json.tool | less
package main
import (
"context"
"flag"
"fmt"
"log"
"github.com/dgraph-io/dgraph/client"
"github.com/dgraph-io/dgraph/protos/api"
"google.golang.org/grpc"
)
var (
dgraph = flag.String("d", "127.0.0.1:9080", "Dgraph server address")
)
func main() {
flag.Parse()
conn, err := grpc.Dial(*dgraph, grpc.WithInsecure())
if err != nil {
log.Fatal(err)
}
defer conn.Close()
dg := client.NewDgraphClient(api.NewDgraphClient(conn))
resp, err := dg.NewTxn().QueryWithVars(context.Background(), `blahblah`, map[string]string)
if err != nil {
log.Fatal(err)
}
fmt.Printf("Response: %s\n", resp.Json)
}Posting this schema to the /alter endpoint of Dgraph should return a { "code": "Success", "message": "Done" } object to indicate the schema was altered. The Dgraph schema defines the data types for each given predicate using a predicate: type [@directive(s)] format. For example, here’s a break down of the tweet.text predicate specification in the schema above.
tweet.text: string @index(fulltext) @count @upsert .
^ ^ ^ ^ ^ ^ ^
| | | | | | end-of-line
| | | | | directive
| | | | directive
| | | tokenizer
| | directive
| type
predicate
- The
tweet.textpredicate is essentially the data field that we’re defining. In this case, anytime we want to perform a query or mutation that interacts with the text of a Tweet we’ll be using thistweet.textpredicate. - The
@indexdirective tells Dgraph to index the predicate based on the passedtokenizer(s). In this case, our data type ofstringallows us to perform a full-text search, which will be useful later so users can easily search through Tweets. - The
@countdirective tells Dgraph to index the number of edges with this predicate, so we can query the number of tweets, perhaps based on filters like the user that authored those tweets. - The
@upsertdirective enables conflict checking when committing a transaction. While this still requires business logic on our part, it can be useful to help prevent duplicate entries under certain circumstances.
The schema specification is quite in-depth, so check out the official schema documentation for more details.
Connecting to Dgraph
Since this project is split into multiple parts, we need to share a lot of code between various aspects of the app. Therefore, we’re alleviating some of this headache by keeping all such code in a separate package called dgraph-query-manager. This package houses the majority of the back-end logic, models, and various helper methods. Essentially, anything that both the client and API may rely upon ends up in this shared package.
Serializing App Data
As with most modern JavaScript apps, most transferred data is in a JSON-like format. Additionally, a great deal of that data is transmitted after sending or receiving Promises, including requests and results. Therefore, it’s useful for our app to have a core “transaction object” that can be used throughout our app. This object indicates when a request is created, what data the request holds, what response was provided, any errors that were generated, and so forth.
Take a look at the dgraph-query-manager/src/classes/Serialization.ts file.
// File: packages/dgraph-query-manager/src/classes/Serialization.ts
export interface SerializationInterface {
command?: string;
data?: any;
error?: Error;
message?: string;
request?: any;
response?: any;
statusCode?: number;
success?: boolean;
uid?: string | string[];
uri: string;
}
export class Serialization implements SerializationInterface {
command?: string;
data?: any;
error?: Error;
message?: string;
request?: any;
response?: any;
statusCode = 200;
success = false;
uid?: string | string[];
uri = '';
constructor(params: Partial<Serialization> = {}) {
Object.assign(this, params);
}
}
While it doesn’t look like much, this Serialization class is used throughout our application. Since JavaScript class instances are effectively just plain JavaScript objects during execution, the Serialization class provides some elegance and structure to an otherwise basic object that can now have useful properties like request, response, data, error, success, and so forth. The Partial<T> construct is quite beneficial and is used throughout the app to accept an unknown set of parameters of a given instance type and to use those parameters in a useful fashion. In this case, a Serialization instance can be created with a partial representation of a Serialization.
Handling Unique Identifiers
Dgraph identifies every node in the database with a unique id called the uid. This value is represented in the system as a hexadecimal string, so it’s critical that our app accounts for this type of identifier. Therefore, we’ve created a Uid class that can help transform between all the possible types of uid data.
Let’s go through the dgraph-query-manager/src/models/Uid.ts file.
// File: packages/dgraph-query-manager/src/models/Uid.ts
import * as crypto from 'crypto';
import { BaseModel } from './BaseModel';
import { Serialization } from '../classes';
enum UidTypes {
Base16,
Base64,
}
interface UidInterface {
type: UidTypes;
uid: string;
}
export type UidParamsType =
| BaseModel<any>
| Uid
| UidTypes
| Serialization
| string
| string[]
| number;
/**
* Uid type to handle custom UIDs necessary for Dgraph integration.
*/
export class Uid implements UidInterface {
type: UidTypes.Base64;
uid: string;
constructor(value?: UidParamsType) {
if (typeof value === undefined) {
this.uid = Uid.generateString(this.type);
} else if (value instanceof Uid) {
Object.assign(this, value);
} else if (value instanceof Serialization) {
if (value.uid) {
this.uid = this.getUidAsHex(value.uid);
}
} else if (value instanceof BaseModel) {
if (value.uid) {
this.uid = this.getUidAsHex(value.uid);
}
} else if (
typeof value === 'string' ||
typeof value === 'number' ||
typeof value === 'object'
) {
this.uid = this.getUidAsHex(value);
} else {
this.uid = Uid.generateString(value);
}
}
toString(): string {
return this.uid;
}
/**
* Generates a new random Uid string.
* @param {UidTypes} type
* @param {number} byteCount
* @returns {string}
*/
static generateString(
type: UidTypes = UidTypes.Base64,
byteCount = 12
): string {
const base64 = crypto
.randomBytes(byteCount)
.toString('base64')
.toLowerCase();
switch (type) {
case UidTypes.Base64:
return base64;
case UidTypes.Base16:
return crypto
.randomBytes(byteCount)
.toString('hex')
.toLowerCase();
default:
return base64;
}
}
/**
* Convert Uid value to hex representation.
* @param {number | string | object} value
* @returns {string}
*/
private getUidAsHex(value: number | string | object | any): string {
if (typeof value === 'string') {
if (value.slice(0, 2) === '0x') {
return value;
} else {
return `0x${parseInt(value).toString(16)}`;
}
} else if (typeof value === 'number') {
return `0x${parseInt(value.toString()).toString(16)}`;
} else if (typeof value === 'object' && Array.isArray(value)) {
// Assume first value is Uid.
return this.getUidAsHex(value[0]);
} else if (typeof value === 'object' && value.hasOwnProperty('uid')) {
return this.getUidAsHex(value.uid);
}
return Uid.generateString(this.type);
}
}
We start by defining the UidInterface that the Uid class will implement. We only really need to store a few properties, the primary of which is the actual uid: string value. The constructor() accepts a passed argument of any of the types specified in UidParamsType, which allows this class to handle just about any uid format we can throw at it. The generateString() method creates a new random uid string in the event that a new Uid instance are created without passing an initial value. Otherwise, the getUidAsHex() method converts a passed value into a hex format.
Managing the Models
We already got a sneak peek at the models we’re using when we defined our schema, but now let’s take a look at the dgraph-query-manager/src/models/BaseModel.ts class, which is the driving logic behind our specific model classes like Tweet, User, and Hashtag.
// File: packages/dgraph-query-manager/src/models/BaseModel.ts
export interface BaseModelInterface {
uid?: Uid;
}
export class BaseModel<T> implements BaseModelInterface {
uid?: Uid;
/**
* Constructs an instance of inheriting class using an (optional) partial parameters object.
* @param {Partial<BaseModel<T>>} params
* @param uid
*/
constructor(params: Partial<BaseModel<T>> = {}, uid?: UidParamsType) {
Object.assign(this, params);
if (this.uid) {
this.uid = new Uid(this.uid);
}
}
}
The BaseModelInterface is kept as simple as possible, so our child classes that inherit BaseModel can define those properties that are unique to them. We’re using a generic type in the BaseModel<T> definition so we can reference the inheriting class instances/types throughout the various BaseModel methods. We’ll see this in action shortly, but this makes it easier to, for example, differentiate between when a Tweet class instance is being used, versus a User or Hashtag instance.
The overall purpose of BaseModel is to allow for the creation and manipulation of inheriting instances, such as Tweet and User. Therefore, let’s take a look at the create() method, along with a few helper methods that accompany it.
// File: packages/dgraph-query-manager/src/models/BaseModel.ts
/**
* Factory that creates BaseModel instances from Partial<BaseModel<T>> paramTypes.
* @param {Partial<BaseModel<T>>} params
* @returns {Promise<BaseModel<T>>}
*/
static async create<T extends typeof BaseModel>(
params: Partial<BaseModel<T>>
): Promise<Serialization> {
const className = this.name;
const serialization = new Serialization({
message: `${className} successfully created.`,
data: params,
request: params
});
try {
const processed = await this.load(params);
serialization.response = new this(processed);
serialization.success = true;
} catch (error) {
logger.info(`${className}.create.load.then failed, error: %o', error`);
serialization.error = error;
serialization.message = `${className} creation failed.`;
serialization.success = false;
}
return serialization;
}
/**
* Generates temporary instance of T and returns object containing combined default properties with passes paramTypes.
* @param {Partial<T>} params
* @returns {InstanceType<T>}
*/
static injectDefaults<T extends typeof BaseModel>(
this: T,
params: Partial<T> = {}
): InstanceType<T> {
const temp = new this() as InstanceType<T>;
return { ...temp, ...params };
}
/**
* Invokes async BaseModel<T> creation process.
* @param {Partial<BaseModel<T>>} params
* @returns {Promise<Partial<BaseModel<T>>>}
*/
static async load<T>(
params: Partial<BaseModel<T>> = {}
): Promise<Partial<BaseModel<T>>> {
// Combine paramTypes with default properties.
params = this.injectDefaults(params);
return params;
}
It’s worth noting that the create() method, as many of the BaseModel methods, are intentionally static as opposed to instance methods. This is because we often need to create a new child instance from scratch, so a factory method pattern is ideal.
Working backward here the injectDefaults() method does just what the name implies and combines all default properties of the child T instance with optional passed properties that will override those defaults. The load() method is a generic method that is further expanded upon in child classes like Tweet, but load() effectively performs the entire creation process of each new BaseModel<T> instance.
Finally, the create() method accepts some partial parameters, creates a new Serialization instance, then invokes the load() method of the inheriting T type instance. Upon a successful promise the serialization.response property is set to a new instance of the child instance.
const processed = await this.load(params);
serialization.response = new this(processed);
This illustrates the importance of defining BaseModel<T> as a generic type, so we can retrieve information about generic instance types that inherit from BaseModel<T>, but without knowing anything more about them. As we’ll soon see, when we invoke the Tweet.create() method, the BaseModel<T>.create() method recognizes it is a type Tweet and populates fields like className.
We’re also using a common pattern you’ll see throughout the app, in which we create a Serialization instance and return a Promise<Serialization> so that other logic throughout the app can evaluate the different properties of the returned Serialization and perform further actions.
You may also notice the BaseModel.upsert<T>() method looks suspiciously similar to the BaseModel.create<T>() method.
// File: packages/dgraph-query-manager/src/models/BaseModel.ts
/**
* Create database node of instance if matching Uid doesn't exist.
* If Uid exists, update node instead.
* @param {Partial<T>} params
* @param {Partial<T> | object} params2
* @returns {Promise<Serialization>}
*/
static async upsert<T>(
params: Partial<T> = {},
params2?: Partial<T> | object
): Promise<Serialization> {
Object.assign(params, params2);
const className = this.name;
const serialization = new Serialization({
message: `${className} upserted.`,
data: params,
request: params
});
try {
const payload = await this.load(params);
serialization.response = new this(payload);
serialization.success = true;
} catch (error) {
serialization.error = error;
serialization.statusCode = 500;
serialization.success = false;
serialization.message = `${className} upsert failed.`;
}
return serialization;
}
That’s because the pattern we’re using when invoking this.load(params) on an inherited BaseModel<T> instance effectively handles both creation and update logic simultaneously (i.e. upsert) through Dgraph. To get a better understanding let’s dive into one such inheriting model, the Tweet class.
Tweet Model
As discussed, while it’d be possible to handle tweets purely as plain JavaScript objects, it’s important that we have additional logic behind our models so we can better manipulate instances in the app and serialize/deserialize transactions between the app and Dgraph. Let’s take a look at dgraph-query-manager/src/models/Tweet.ts file.
// File: packages/dgraph-query-manager/src/models/Tweet.ts
export interface TweetInterface extends BaseModelInterface {
'tweet.createdAt': Date | string;
'tweet.hashtag'?: Hashtag[];
'tweet.inReplyToStatusId'?: Uid;
'tweet.inReplyToUserId'?: Uid;
'tweet.isQuoteStatus': boolean;
'tweet.quotedStatus'?: Tweet;
'tweet.text': string;
'tweet.user': User;
}
export class Tweet extends BaseModel<Tweet> implements TweetInterface {
constructor(params: Partial<Tweet> = {}) {
super(params);
// Override defaults
Object.assign(this, Tweet.deserialize(params));
}
/**
* Deserialize Dgraph form of Tweet object.
* @param {Partial<any | Tweet>} params
* @returns {Promise<Partial<Tweet>>}
*/
static deserialize<Tweet>(params: Partial<Tweet | any> = {}): Partial<Tweet> {
// Dates
if (params['tweet.createdAt'])
params['tweet.createdAt'] = new Date(params['tweet.createdAt']);
// User
if (params['tweet.user']) {
params['tweet.user'] = new User(params['tweet.user']);
}
// Hashtags
if (params['tweet.hashtag']) {
if (Array.isArray(params['tweet.hashtag'])) {
params['tweet.hashtag'] = params['tweet.hashtag'].map(
hashtag => new Hashtag(hashtag)
);
} else {
params['tweet.hashtag'] = [new Hashtag(params['tweet.hashtag'])];
}
}
// Uids
if (params['tweet.inReplyToStatusId'])
params['tweet.inReplyToStatusId'] = new Uid(
params['tweet.inReplyToStatusId']
);
if (params['tweet.inReplyToUserId'])
params['tweet.inReplyToUserId'] = new Uid(
params['tweet.inReplyToUserId']
);
params = super.deserialize(params);
return params;
}
}
As expected, the TweetInterface adds all the properties we defined in our schema. The Tweet.deserialize<Tweet>() method that is invoked within the constructor is where we start to see that common logic for serializing and deserializing data throughout the app. As we saw before, Tweet.deserialize<Tweet>() accepts a Partial<Tweet> argument and then processes those potential params by ensuring values like tweet.user are deserialized and converted into their representative model forms. Fields that are uid values are similarly returned back to Uid instances, and so forth. The final step before returning the newly-deserialized parameters is to invoke super.deserialize(), which calls BaseModel<Tweet>.deserialize<Tweet>() in this case.
// File: packages/dgraph-query-manager/src/models/BaseModel.ts
export class BaseModel<T> implements BaseModelInterface {
/**
* Deserialize Dgraph object.
* @param {Partial<any | T>} params
* @returns {Promise<Partial<T>>}
*/
static deserialize<T>(params: Partial<T | any> = {}): Partial<T> {
// Update Uid
if (params.uid) {
if (Array.isArray(params.uid)) {
// Assume first Uid is applicable
params.uid = new Uid(params.uid[0]);
} else {
params.uid = new Uid(params.uid);
}
}
return params;
}
}
The BaseModel deserialization only performs a small bit of logic, converting any extraneous uids into Uid instances once again.
That’s great and all, but how does this deserialization help? Let’s look at the result of the following query which retrieves the first node that contains tweet.text (i.e. a “Tweet”) Tweet node, along with all nodes of its immediate edges.
{
user(func: has(tweet.text), first: 1)
{
uid
expand(_all_) {
uid
expand(_all_)
}
}
}curl http://127.0.0.1:8080/query -XPOST -d '
{
user(func: has(tweet.text), first: 1)
{
uid
expand(_all_) {
uid
expand(_all_)
}
}
}' | python -m json.tool | less
package main

import (
  "context"
  "flag"
  "fmt"
  "log"
  "github.com/dgraph-io/dgraph/client"
  "github.com/dgraph-io/dgraph/protos/api"
  "google.golang.org/grpc"
)

var (
  dgraph = flag.String("d", "127.0.0.1:9080", "Dgraph server address")
)

func main() {
  flag.Parse()
  conn, err := grpc.Dial(*dgraph, grpc.WithInsecure())
  if err != nil {
    log.Fatal(err)
  }
  defer conn.Close()


  dg := client.NewDgraphClient(api.NewDgraphClient(conn))


  resp, err := dg.NewTxn().Query(context.Background(), `blahblah`)

  if err != nil {
    log.Fatal(err)
  }
  fmt.Printf("Response: %s\n", resp.Json)
}Since initial data is pseudo-randomly generated your result will differ slightly, but it should look something like the following.
{
"extensions": {
"server_latency": {
"parsing_ns": 6200,
"processing_ns": 21956300,
"encoding_ns": 1452000
},
"txn": {
"start_ts": 189466
}
},
"data": {
"user": [
{
"uid": "0x33487",
"tweet.user": [
{
"uid": "0x3347f",
"user.description": "Libero voluptatibus tenetur perferendis placeat. Reprehenderit quo ab nemo. Magnam ut libero quis repellendus nisi. Et non odit et voluptates excepturi.",
"user.name": "Abagail Klocko",
"user.createdAt": "2019-05-03T17:01:19.513Z",
"user.avatar": "https://s3.amazonaws.com/uifaces/faces/twitter/peter576/128.jpg",
"user.email": "Ellen_Daugherty@example.org",
"user.location": "Annestad, Nigeria",
"user.screenName": "Raina73",
"user.url": "https://lesley.biz"
}
],
"tweet.text": "@Dandre_Hoppe3 Customizable attitude-oriented product #turn-key #out-of-the-box",
"tweet.hashtag": [
{
"uid": "0x33485",
"hashtag.hashtag": "turn",
"hashtag.indices": [59, 54]
},
{
"uid": "0x33486",
"hashtag.hashtag": "out",
"hashtag.indices": [68, 64]
}
],
"tweet.createdAt": "2019-05-03T17:01:19.686Z",
"tweet.isQuoteStatus": false,
"~user.favorites": [
{
"uid": "0x33456",
"user.url": "https://flossie.name",
"user.avatar": "https://s3.amazonaws.com/uifaces/faces/twitter/silv3rgvn/128.jpg",
"user.description": "Quasi voluptas animi omnis rerum molestias voluptatem velit qui quis. Earum nobis quasi quasi corporis dolorem autem. Est fugit consequatur sit. Accusantium maiores earum deserunt omnis. Dolor facilis facilis. Est in atque nihil.",
"user.name": "Birdie Walsh",
"user.createdAt": "2019-05-03T17:01:18.464Z",
"user.email": "Crawford_OReilly@example.com",
"user.location": "Hellerburgh, American Samoa",
"user.screenName": "Glenda_Nikolaus"
}
],
"~user.retweets": [
{
"uid": "0x33454",
"user.name": "Savanna Rogahn II",
"user.location": "Hicklefort, Equatorial Guinea",
"user.url": "https://hortense.info",
"user.createdAt": "2019-05-03T17:01:18.412Z",
"user.avatar": "https://s3.amazonaws.com/uifaces/faces/twitter/lebronjennan/128.jpg",
"user.description": "Culpa nihil nobis consequuntur impedit reiciendis totam odio. Quis et tempora facilis provident sint et voluptas ipsam. Et eaque magnam nihil vitae molestiae nemo beatae neque nihil. Rerum et sit nisi qui sit voluptatem enim rerum voluptas. Vitae et voluptates cumque neque sit veniam minima.",
"user.email": "Clemmie.Boehm@example.com",
"user.screenName": "Jazlyn55"
}
]
}
]
}
}
As you may recall from our schema, predicates like tweet.user, tweet.hashtag, and tweet.inReplyToStatusId are uid, [uid], uid types, respectively. Dgraph knows to retrieve the nodes and relevant data for predicates of such data types when we request them, because of the “edge” the two nodes share. This provides a tremendous amount of power since we can easily retrieve nodes and their relationships without requiring any complex SQL-like queries. Consider the tweet.inReplyToStatusId predicate in particular. Our base tweet node has a uid of 0xbf8 and its own edge values like "tweet.text": "@GabeStah Totam et quo rem et quisquam eligendi quod enim. #efficient #ducimus". However, tweet.inReplyTostatusId references a different tweet node with a uid of 0x10a3, and its entire set of related edges is returned in the query above, including its own tweet.text of "@Keara_Walter33 Open-architected multi-state utilisation #clicks-and-mortar #out-of-the-box". Pretty cool!
So, when we query Dgraph and get a result like the one above how do we convert that JSON into our model-like formats? We deserialize it! With the logic we explored above in Tweet.ts and BaseModel.ts, our constructor can accept a partial Tweet object retrieved from Dgraph and go through the process of deserializing it to convert fields like tweet.inReplyToStatusId into a Tweet model instance.
tweet.inReplyToStatusId. Dgraph and GraphQL+- do not have any such requirements, so the first reason is just to better illustrate the separation of concerns between where we expect data to be stored. The second reason is since this is a Twitter clone app, we’re using many of the same field names that the official Twitter API uses. That said, feel free to name your predicates however you see fit.
Creating Tweets
To see how we create a new Tweet first recall that the BaseModel<T>.create() method invokes the this.load() method and uses that result to generate a new instance of this.
// File: packages/dgraph-query-manager/src/models/BaseModel.ts
static async create<T extends typeof BaseModel>(
params: Partial<BaseModel<T>>
): Promise<Serialization> {
const className = this.name;
const serialization = new Serialization({
message: `${className} successfully created.`,
data: params,
request: params
});
try {
const processed = await this.load(params);
serialization.response = new this(processed);
serialization.success = true;
} catch (error) {
logger.info(`${className}.create.load.then failed, error: %o', error`);
serialization.error = error;
serialization.message = `${className} creation failed.`;
serialization.success = false;
}
return serialization;
}
The Tweet.load() method contains all the logic for serializing itself into a format Dgraph understands, performing the actual insertion (i.e. mutation), and then deserializing and returning the result.
// File: packages/dgraph-query-manager/src/models/Tweet.ts
export class Tweet extends BaseModel<Tweet> implements TweetInterface {
/**
* Performs all steps of async Tweet creation.
* @param {Partial<Tweet>} params
* @returns {Promise<Partial<Tweet>>}
*/
static async load(params: Partial<Tweet> = {}): Promise<Partial<Tweet>> {
// Combine paramTypes with default properties.
params = this.injectDefaults(params);
// Load child elements (e.g. User.load(['tweet.user']) )
params = await this.loadChildren(params);
// Serialize (e.g. convert fields to payload-compatible object)
params = await this.serialize(params);
// Perform mutation (e.g. upsert)
const serialization = await this.insert(params);
if (!params.uid) {
params.uid = new Uid(serialization);
}
// Deserialize (e.g. convert payload back to Models)
params = this.deserialize(params);
return params;
}
/**
* Preprocessor that parses text, Hashtags, and User. Invokes .create methods for each to ensure children exist.
* @param {Partial<Tweet>} params
* @returns {Promise<Partial<Tweet>>}
*/
static async loadChildren(
params: Partial<Tweet> = {}
): Promise<Partial<Tweet>> {
// Only create Hashtags if no Hashtags exist
if (!params['tweet.hashtag'] || params['tweet.hashtag'].length === 0) {
// Parse hashtags
params = this.extractHashtags(params);
// Create Hashtags
const hashtags = params['tweet.hashtag'];
if (hashtags && Array.isArray(hashtags) && hashtags.length > 0) {
params['tweet.hashtag'] = (await Hashtag.createMany(
hashtags
)) as Hashtag[];
}
}
// Create User
const user = params['tweet.user'];
if (user && Object.keys(user).length > 0) {
params['tweet.user'] = (await User.create(user)).response as User;
}
return params;
}
}
Stepping through the logic of Tweet.load() we already saw how injectDefaults() works, but after default values are loaded we then need to ensure any children are also loaded before the parent Tweet object is created. This prevents invalid data from being inserted into the database and also ensures the data we do add is as complete as possible since we don’t want to perform unnecessary mutations or queries.
In this case, Tweet.loadChildren() determines if the existing params contain Hashtags, and if not, it then extracts potential hashtags from the tweet.text value via the this.extractHashtags() method. If any hashtags are extracted it creates a new Hashtag[] array by calling Hashtag.createMany() with the passed parameters. Here we see the importance of our BaseModel<T> using generic types, since the Hashtag class doesn’t actually have a createMany() method – we’re just invoking the BaseModel<Hashtag>.createMany() method instead.
A similar process occurs for the tweet.user parameter by creating a new User instance if the params indicate that one exists.
Tweet.loadChildren() method invokes Hashtag.createMany() and User.create() as necessary, this provides the proper order of operations discussed above. Calling .create() within the User and Hashtag classes invokes their own .load() procedures, respectively, which ensures the result of Tweet.loadChildren() contains all the newly created child instances that are needed for the Tweet to be created. Since the load process of any individual model actually connects to Dgraph and performs a new transaction as needed, the resulting model instances will even contain their newly-generated uid values.
After children are loaded we need to invoke the BaseModel<T>.serialize() method, which does just as it sounds and converts our model instance into a serialized format that Dgraph can work with.
// File: packages/dgraph-query-manager/src/models/BaseModel.ts
export class BaseModel<T> implements BaseModelInterface {
/**
* Serialize object into Dgraph acceptable format for JSON transaction.
* @param {Partial<any | T>} params
* @returns {Promise<Partial<T>>}
*/
static async serialize<T>(
params: Partial<T | any> = {}
): Promise<Partial<T>> {
const serialization: any = {};
// Update Uid
if (params.uid) {
if (Array.isArray(params.uid)) {
// Assume first Uid is applicable
params.uid = new Uid(params.uid[0]);
} else {
params.uid = new Uid(params.uid);
}
}
for await (const key of Object.keys(params)) {
// Ignore reverse edges.
if (key.charAt(0) !== '~') {
// Check if Uid
if (params[key] instanceof Uid && key === 'uid') {
// Convert Uid to string values
serialization[key] = params[key].toString();
} else if (params[key] instanceof BaseModel) {
// For BaseModel instances recursively serialize
serialization[key] = await this.serialize(params[key]);
} else if (
Array.isArray(params[key]) &&
params[key].filter(instance => instance instanceof BaseModel).length >
0
) {
const instances: any[] = [];
for await (const instance of params[key]) {
instances.push(await this.serialize(instance));
}
serialization[key] = instances;
} else {
serialization[key] = params[key];
}
}
}
return serialization;
}
}
The majority of the serialization process is converting Uid instances into string representations since Dgraph can’t handle a scalar value (i.e. a JavaScript object) where it expects a uid type.
The last major step for creating a new Tweet is to perform the actual mutation in Dgraph, then deserialize and return the result. Thus, the .load() method invokes the BaseModel<T>.insert() method, which can be seen below.
// File: packages/dgraph-query-manager/src/models/BaseModel.ts
export class BaseModel<T> implements BaseModelInterface {
/**
* Directly insert object into database.
* @param {Partial<T>} params
* @param {Partial<T> | object} params2
* @returns {Promise<Serialization>}
*/
static async insert<T>(
params: Partial<T> = {},
params2?: Partial<T> | object
): Promise<Serialization> {
Object.assign(params, params2);
const adapter = new DgraphAdapter();
const className = this.name;
let serialization = new Serialization({
message: `${className} created.`,
request: params,
data: params,
});
try {
serialization = await adapter.mutate(serialization);
serialization.success = true;
} catch (error) {
serialization.statusCode = 500;
serialization.success = false;
serialization.error = error;
serialization.message = `${className} creation failed.`;
}
return serialization;
}
}
Similar to the BaseModel<T>.create() method, BaseModel<T>.insert() returns a Serialization instance based on the result of the mutation. The critical line here is serialization = await adapter.mutate(serialization); in which we connect to Dgraph and perform the actual mutation. The result (which is also a Serialization) is then returned by BaseModel<T>.insert() and tells us whether we succeeded or not. Thus, this is a great time to take a look at how we perform mutations, which is done in the DgraphAdapterHttp class.
Using the Dgraph Adapter
We’re working with the dgraph-js-http library to execute queries and mutations on our Dgraph server, but we need an adapter that bridges our model data to transactional data Dgraph understands and can work with. Therefore, let’s take a look at dgraph-query-manager/src/adapters/DgraphAdapterHttp.ts.
// File: packages/dgraph-query-manager/src/adapters/DgraphAdapterHttp.ts
export class DgraphAdapterHttp {
/**
* Endpoint address of Dgraph server.
*/
address = config.dgraph.adapter.address;
/**
* Dgraph client.
*/
protected client: NonNullable<DgraphClient>;
/**
* Dgraph client stub.
*/
protected clientStub: NonNullable<DgraphClientStub>;
constructor(address?: string) {
if (address) this.address = address;
this.clientStub = new DgraphClientStub(this.address);
this.client = new DgraphClient(this.clientStub);
}
/**
* Alter the database schema.
* @param {string} schema
* @returns {Promise<boolean>}
*/
async alterSchema(schema: string): Promise<boolean> {
try {
await this.client.alter({ schema });
logger.info(`Dgraph schema altered: %s`, schema);
return true;
} catch (error) {
logger.error(`Dgraph schema alteration failed, error: %s`, error);
return false;
}
}
/**
* Drop all database data.
* @returns {Promise<boolean>}
*/
async dropAll(): Promise<boolean> {
try {
await await this.client.alter({ dropAll: true });
logger.info(`All Dgraph data dropped.`);
return true;
} catch (error) {
logger.error(`Dgraph data drop failed, error: %s`, error);
return false;
}
}
/**
* Removes top-level array from object if singular value.
* @param {object} obj
* @returns {any}
*/
static flatten(obj: any) {
return _.isArray(obj) && obj.length === 1 ? obj[0] : obj;
}
/**
* Recursively flattens arrays within passed object.
* Sets object key value pointing to a single-element array to value of that only element.
* @param {object} obj
* @returns {any}
*/
static flattenArrays(obj: any) {
let copy: any = obj;
if (Array.isArray(obj) && obj.length === 1) {
copy = DgraphAdapterHttp.flattenArrays(copy[0]);
} else if (Array.isArray(obj)) {
obj.forEach((value, key) => {
copy[key] = DgraphAdapterHttp.flattenArrays(value);
});
} else {
for (const key in obj) {
if (obj.hasOwnProperty(key)) {
if (Array.isArray(obj[key]) && obj[key].length === 1) {
// Set keyvalue to first (and only) array value.
copy[key] = DgraphAdapterHttp.flattenArrays(obj[key][0]);
}
}
}
}
return copy;
}
/**
* Execute a database mutation using passed payload object or BaseModel<T> instance.
* @param {Serialization} serialization
* @param {MutationTypes} mutationType
* @param {boolean} commitNow
* @returns {Promise<Partial<T>>}
*/
async mutate<T>(
serialization: Serialization,
mutationType: MutationTypes = MutationTypes.SetJson,
commitNow = false
): Promise<Serialization> {
if (serialization.request === undefined) {
throw Error(
`DgraphAdapterHttp.mutate error, payload undefined for data: ${
serialization.data
}`
);
}
const transaction = this.client.newTxn();
const uids: string[] = [];
logger.debug('DgraphAdapterHttp.mutate, payload: %o', serialization);
try {
const payload: any = {};
payload.commitNow = commitNow;
switch (mutationType) {
case MutationTypes.SetJson:
payload.setJson = serialization.request;
break;
case MutationTypes.DeleteJson:
payload.deleteJson = serialization.request;
break;
}
const assigned = await transaction.mutate(payload);
if (!commitNow) await transaction.commit();
Object.entries(assigned.data.uids).forEach(([key, uid]) =>
uids.push(uid)
);
} catch (e) {
logger.error(
'DgraphAdapterHttp.mutate, payload: %o, mutationType: %o, error: %o',
serialization,
mutationType,
e
);
} finally {
await transaction.discard();
}
// Assign generated uids
if (uids.length > 0) serialization.uid = uids;
return serialization;
}
/**
* Execute a database query.
* @param {string} serialization
* @returns {Promise<string>}
*/
async query<T>(serialization: Serialization): Promise<Serialization> {
const transaction = this.client.newTxn();
try {
const res = await transaction.query(serialization.request);
serialization.response = DgraphAdapterHttp.flatten(res.data);
} catch (e) {
logger.error('DgraphAdapterHttp.query, error: %o', e);
} finally {
await transaction.discard();
}
return serialization;
}
/**
* Execute a database query with paramTypes.
* @param {string} serialization
* @param vars
* @returns {Promise<any>}
*/
async queryWithVars(
serialization: Serialization,
vars?: any
): Promise<Serialization> {
const transaction = this.client.newTxn();
try {
const res = await transaction.queryWithVars(serialization.request, vars);
serialization.response = DgraphAdapterHttp.flatten(res.data);
} catch (e) {
logger.error(
'DgraphAdapterHttp.queryWithVars, query: %s, paramTypes: %o, error: %o',
serialization,
vars,
e
);
} finally {
await transaction.discard();
}
return serialization;
}
}
Logically, the DgraphAdapterHttp class mimics much of the client and transaction logic found in the dgraph-js-http package. The DgraphAdapterHttp exposes helper methods for adapting our custom business logic and models to the underlying transaction methods of dgraph-js-http. To that end, the constructor creates a new Dgraph client and client stub used to connect to our Dgraph server. As you’ll recall, the BaseModel<T>.insert() method that performs the actual creation of data in our app invokes the DgraphAdapterHttp.mutate<T>() method, so let’s examine what’s going on in there.
As we’ve seen before, the main argument passed to the DgraphAdapterHttp.mutate<T>() is a Serialization instance which has a .request property. We create a new transaction using the Dgraph client, then create a temporary payload object into which we’ll assign the appropriate properties that Dgraph expects, depending on the mutation we want to perform. For example, the setJson property is used when we want to set data in JSON format. This comes directly from the DgraphClientStub class in dgraph-js-http. We assign the payload.setJson property to our serialization.request value, then invoke the transaction.mutate() method from dgraph-js-http, which passes the payload and returns the result. If applicable, we also grab the node uid(s) that were generated as a result of this transaction and assign them to our returned serialization object. As you can see, the other DgraphAdapterHttp methods such as .query() and .queryWithVars() function much the same way, so we won’t go into detail on how those work.
DgraphAdapter package is also included in the dgraph-query-manager/packages directory. It functions similarly to the DgraphAdapterHttp class that is covered in this guide section, but it uses the dgraph-js library for Node-based grpc transactions.
Organizing Queries
Another major component of the DgraphQueryManager package is the Query class. The Query class simplifies the process of creating and managing GraphQL+- queries so the dgraph-twitter-clone app can invoke them in whatever manner is needed, whether directly, indirectly, or via the API. To explore the Query class let’s first quickly look at an example of how a new Query instance is generated in the Queries/TweetQueries.ts file.
// File: packages/dgraph-query-manager/src/classes/Queries/TweetQueries.ts
export const TweetQueries = {
/**
* Get first N Tweets.
*/
getAllPaginated: new Query(
`query find($count: int = 10) {
data(func: has (tweet.text), first: $count) {
uid
expand(_all_) {
uid
expand(_all_)
}
}
}`,
'/tweets/:count',
[new ParamType('$count', TypeOf(String))]
),
};
The actual GraphQL+- query text passed as the first argument above should look pretty familiar to you – it’s close to what we executed at the start of this tutorial.
query find($count: int = 10) {
data(func: has (tweet.text), first: $count) {
uid
expand(_all_) {
uid
expand(_all_)
}
}
}curl http://127.0.0.1:8080/query -XPOST -d '
query find($count: int = 10) {
data(func: has (tweet.text), first: $count) {
uid
expand(_all_) {
uid
expand(_all_)
}
}
}' | python -m json.tool | less
package main

import (
  "context"
  "flag"
  "fmt"
  "log"
  "github.com/dgraph-io/dgraph/client"
  "github.com/dgraph-io/dgraph/protos/api"
  "google.golang.org/grpc"
)

var (
  dgraph = flag.String("d", "127.0.0.1:9080", "Dgraph server address")
)

func main() {
  flag.Parse()
  conn, err := grpc.Dial(*dgraph, grpc.WithInsecure())
  if err != nil {
    log.Fatal(err)
  }
  defer conn.Close()


  dg := client.NewDgraphClient(api.NewDgraphClient(conn))


  resp, err := dg.NewTxn().Query(context.Background(), `blahblah`)

  if err != nil {
    log.Fatal(err)
  }
  fmt.Printf("Response: %s\n", resp.Json)
}In this case we’re passing a GraphQL-style variable called $count. This allows queries to receive arguments at runtime in the form of passed parameters. You may recall above we mentioned the DgraphAdapterHttp.queryWithVars() method – the vars passed there is an object containing the key/value pairs that the query string expects. So, we could call the above query and pass the following params object as vars to retrieve the first 50 tweets, rather than the default of only 10.
const params = {
$count: 50,
};
Back to the Query class, which is found at dgraph-query-manager/src/classes/Query.ts.
// File: packages/dgraph-query-manager/src/classes/Query.ts
export enum HttpMethods {
DELETE,
GET,
POST,
PUT,
}
export interface QueryInterface {
httpMethod: HttpMethods;
objectType: string;
params: object;
paramTypes?: ParamType<any>[];
query: string;
route: string;
tree: string[][];
}
/**
* Helper class for creating queries to be executed by Dgraph via dgraph-adapter.
*/
export class Query implements QueryInterface {
private _objectType: string;
get objectType(): string {
// Set initial value if not specified.
if (!this._objectType) this.objectType = this.getObjectTypeFromRoute();
return this._objectType;
}
set objectType(value: string) {
this._objectType = value;
}
params: object;
httpMethod: HttpMethods = HttpMethods.GET;
paramTypes?: ParamType<any>[];
query: string;
route: string;
tree: string[][] = [];
/**
* @param query - Query string.
* @param route - REST_API route.
* @param paramTypes? - Collection of valid parameter types.
* @param tree? - Results tree definition.
* @param httpMethod
* @param params
*/
constructor(
query: string,
route: string,
paramTypes?: ParamType<any>[],
tree?: string | string[],
httpMethod: HttpMethods = HttpMethods.GET,
params?: object
) {
this.paramTypes = paramTypes;
this.parseTree(tree);
this.query = query;
this.route = route;
this.httpMethod = httpMethod;
if (params) this.params = params;
}
/**
* Parses the route string and obtains assumed retrieved object type.
* e.g. '/tweets/:uid' returns 'tweets'
*/
private getObjectTypeFromRoute(): string {
const value = this.route.split('/')[1];
return value ? value : 'Unknown';
}
/**
* Validates passed params with specified paramTypes, if applicable.
*/
validateParams() {
const paramTypes = this.paramTypes;
if (!this.params) {
if (paramTypes) {
logger.error(`No params found for query: ${this.query}`);
return false;
}
} else {
if (paramTypes) {
paramTypes.forEach(paramType => {
// Check that params contain this paramType key.
if (this.params.hasOwnProperty(paramType.key)) {
// Skip undefined or null
if (this.params[paramType.key]) {
// Checks that constructor type of parameter matches paramType.
if (
this.params[paramType.key].constructor.name !==
paramType.type.constructor.name
) {
logger.error(
`Param for key of (${
paramType.key
}) must match constructor paramType of (${
paramType.type.constructor.name
}).`
);
return false;
}
}
} else {
logger.error(
`Params must contain paramType key of (${paramType.key}).`
);
return false;
}
});
}
}
return true;
}
}
I’ve cut out of a few extra helper methods above to focus on the main logic. As seen in the TweetQueries.getAllPaginated query instantiation above we’ve passed a number of arguments to the Query constructor. The first is our GraphQL+- query string. The second is a route string, which will be used by ExpressJS in the event we want to perform a query with the API (more on that later). The third parameter is an array of custom ParamType objects, which are custom types that help determine if passed runtime parameters are valid. We’ll see how these are validated in the next section.
Simplifying Query Execution
The final major component of the DgraphQueryManager package is the DgraphQueryExecutor, which is found in the dgraph-query-manager/src/classes/DgraphQueryExecutor.ts file. As we saw in the Models section our BaseModel<T> and subsequent inheriting models all have the ability to manipulate their data explicitly and invoke Dgraph queries/transactions themselves. However, as discussed at the outset of this guide one overall goal of this project is to allow the dgraph-twitter-clone client app to perform Dgraph transactions in a variety of ways, including directly with GraphQL+- queries, with JSON-like object data, or indirectly via the API app. We absolutely could bypass the use of the Query class and just manually pass query strings (with optional params) to our DgraphAdapterHttp instance to perform Dgraph queries. On the other hand, there are some use cases where an intermediary middleware is necessary for the application to function properly. Whether that’s an API or simply just additional logic is based on the app, so the dgraph-twitter-clone app provides the means to do all those types of interactions with Dgraph. We’ll look at the differences in functionality when we explore the client app, but the three methods can be swapped between by changing the config.connectionType property in dgraph-query-manager/src/config/development.ts.
So, what does the DgraphQueryExecutor actually do? Let’s dig into the code a bit.
// File: packages/dgraph-query-manager/src/classes/DgraphQueryExecutor.ts
export enum DgraphConnectionType {
API,
REST_API,
DIRECT,
}
export interface DgraphQueryExecutorInterface {
isMutation: boolean;
query: Query;
request?: Serialization;
}
export enum DgraphQueryExecutorModes {
Query,
QueryWithVars,
Json,
DeleteJson,
}
export class DgraphQueryExecutor implements DgraphQueryExecutorInterface {
isMutation = false;
query: Query;
request?: Serialization;
constructor(
query: Query,
params?: object,
isMutation = false,
request?: Serialization
) {
this.isMutation = isMutation;
this.query = query;
this.request = request;
if (params) this.query.params = params;
if (query.validateParams()) {
query.injectCustomParams();
}
}
/**
* Execute Dgraph query based on instance properties and configuration.
*/
async execute(
connectionType: DgraphConnectionType = config.connectionType
): Promise<Serialization> {
let serialization;
if (connectionType === DgraphConnectionType.REST_API) {
serialization = await this.executeRestApiRequest();
} else if (connectionType === DgraphConnectionType.API) {
serialization = await this.executeJsonApiRequest();
} else {
// Default to direct.
serialization = await this.executeDirectRequest(this.request);
}
// Assume singular array of 'data' if not included.
const tree =
this.query.tree && this.query.tree.length > 0
? this.query.tree
: new Array(['data']);
if (serialization.response) {
let combinedResponse: any[] = [];
for (const branch of tree) {
let branchResponse = serialization.response;
for (const stick of branch) {
if (branchResponse[stick]) {
branchResponse = branchResponse[stick];
}
}
// Combines all previous arrays with new response array to generate full result set.
combinedResponse = combinedResponse.concat(branchResponse);
}
serialization.message = `No ${this.query.objectType} found.`;
// Flatten arrays
serialization.response = DgraphAdapter.flattenArrays(
combinedResponse ? combinedResponse : serialization.response
);
if (
!Array.isArray(serialization.response) ||
(Array.isArray(serialization.response) &&
serialization.response.length > 0)
) {
serialization.message = `${this.query.objectType} found.`;
serialization.success = true;
}
}
return serialization;
}
/**
* Makes a REST API query request via explicit `/api/route/endpoints`.
*/
async executeRestApiRequest(): Promise<Serialization> {
const uri = this.query.uri(this.query.params);
const response = new Serialization({
message: `Failed to retrieve ${
this.query.objectType
} via REST API request.`,
request: this.query.query,
uri,
});
// Get URL
const url = `${config.dgraph.api.protocol}://${config.dgraph.api.host}:${
config.dgraph.api.port
}/api/${uri}`;
try {
const axiosResponse = await axios.get(url);
logger.info(
`DgraphQueryExecutor.executeRestApiRequest response %o`,
axiosResponse.data
);
response.response = axiosResponse.data.response;
response.success = true;
} catch (error) {
logger.error(error);
response.error = error;
}
return response;
}
/**
* Makes an API query request via JSON payload.
*/
async executeJsonApiRequest(): Promise<Serialization> {
const response = new Serialization({
message: `Failed to retrieve ${
this.query.objectType
} via JSON API request.`,
request: this.query.query,
});
// Get URL
const url = `${config.dgraph.api.protocol}://${config.dgraph.api.host}:${
config.dgraph.api.port
}/api/json`;
try {
const axiosResponse = await axios.post(url, this);
logger.info(
`DgraphQueryExecutor.executeJsonApiRequest response %o`,
axiosResponse.data
);
response.response = axiosResponse.data.response;
response.success = true;
} catch (error) {
logger.error(error);
response.error = error;
}
return response;
}
/**
* Makes a direct request via GraphQL+-.
* @param request
*/
async executeDirectRequest(request?: Serialization): Promise<Serialization> {
const adapter = new DgraphAdapter();
let response = new Serialization({
message: `Failed to retrieve ${
this.query.objectType
} via direct GraphQL+ request.`,
request: this.query.query,
});
// Allow request to be optionally passed.
request = request ? request : response;
if (this.isMutation) {
response = await adapter.mutate(request);
} else {
if (this.query.paramTypes) {
response = await adapter.queryWithVars(request, this.query.params);
} else {
response = await adapter.query(request);
}
}
return response;
}
}
As the name implies, all DgraphQueryExecutor really does is provides a logical wrapper for executing Query instances in the appropriate manner. The constructor accepts a Query argument, along with a few optional arguments. As mentioned, we want to allow Dgraph transactions to occur in a variety of ways, so the DgraphQueryExecutor.execute() method accepts an optional connectionType argument and executes a request based on that type of transaction. There’s also a bit of logic to clean up the Serialization response by removing extraneous data, flattening singular top-level arrays, and so forth. However, the real meat and potatoes are in the executeX methods.
For example, DgraphQueryExecutor.executeDirectRequest() takes the this.query property and creates a valid Serialization request object out of it, which is then passed along to the appropriate DgraphAdapterHttp method that performs the actual Dgraph transaction. While this fancies things up, invoking the executeDirectRequest() method is no different than directly calling our Dgraph adapter and passing the appropriate query string and optional params.
The DgraphQueryExecutor.executeRestApiRequest() method starts by generating a valid uri using the Query instance uri property and the query params.
// File: packages/dgraph-query-manager/src/classes/Query.ts
export class Query implements QueryInterface {
/**
* Generates the proper URI from route and passed params.
* @param params
*/
uri(params?: object): string | undefined {
let newUri = this.route;
if (params) {
// replace $ in params with :
Object.entries(params).forEach(([key, value]) => {
newUri = newUri.replace(key.replace('$', ':'), value);
});
}
return newUri;
}
}
The Query.uri() method can be seen above and essentially just replaces passed params values into the route property string where they go. This changes a REST endpoint of something like /tweets/user/:id into /tweets/user/0x12f42.
The DgraphQueryExecutor.executeRestApiRequest() method uses the Axios HTTP client to perform a request to the generated URL endpoint and assigns the response to the response Serialization instance that is returned.
dgraph-twitter-clone example app merely return data based on their simple parameters. A fully-fledged app would obviously expand on the endpoint system and even accept custom data at those endpoints, but merely calling axois.get(url) to illustrate the point works fine here.
Lastly, the DgraphQueryExecutor.executeJsonApiRequest() method is similar to executeRestApiRequest(), but what’s critically different is the call to axios.post(url, this). First, you’ll notice the generated url endpoint is a static /api/json. Second, we’re actually passing the entire DgraphQueryExecutor instance (this) to our API endpoint. What does this accomplish? It effectively allows us to perform direct JSON-like transactions on Dgraph, but by first passing through our API. We’ll see how the API handles this in that section of the guide, but this method of performing a Dgraph transaction is a nice middle ground between direct calls and pure REST API – we can still use complex objects and instances along with the power of Dgraph’s GraphQL+- query language, while also invoking our own “middleware” API for pre-transaction processing. Cool!
Building the API Server
Now we’ll start digging into the simple dgraph-twitter-clone API, which allows for either REST API endpoint requests or JSON-like payload requests, depending on the needs of the requester. The API heavily relies on the routing functionality provided by the ExpressJS framework, so check out their official documentation for more info on Express. With that, let’s get into it!
If you’d like to install and run the dgraph-twitter-clone/api app on your local machine to easily follow along with this guide you can do so by following the installation instructions. Alternatively, if you’ve already cloned the dgraph-twitter-clone repository and have Dgraph up and running, you can start the API by executing the npm start or yarn start command from the dgraph-twitter-clone/api directory.
Initialization
Like most ExpressJS apps we define the API app in the root api/src/app.ts file, as seen below.
// File: api/src/app.ts
import * as express from 'express';
import * as bodyParser from 'body-parser';
import * as cors from 'cors';
import { Routes } from './routes';
import logger from './helpers/logger';
// Set up the express app
const app = express();
// Prevent CORS errors
app.use(cors());
// Parse incoming requests data
app.use(bodyParser.json());
app.use(bodyParser.urlencoded({ extended: false }));
app.use('/api/', [Routes]);
const port = 5000;
app.listen(port, () => {
logger.info(`API service is listening on port ${port}.`);
});
After initializing a new express() instance we call app.use() to add a handful of middlewares such as allowing cross-origin resource sharing and parsing incoming JSON requests. All API routes are prefixed with the /api/ endpoint and the majority of the app logic is found in the api/src/routes/Routes.ts file.
Handling JSON API Payloads
// File: api/src/routes/Routes.ts
export const Routes = express.Router();
/**
* Api routes for JSON body requests.
* Creates a new Query and DgraphQueryExecutor instance from passed body data, then executes a direct request
* and returns the resulting Serialization.
*/
Routes.post(
'/json',
asyncWrapper(async (req, res) => {
const query = Query.factory(req.body.query);
if (req.body.query.tree) {
query.tree = req.body.query.tree;
}
req.body.query = query;
const executor = DgraphQueryExecutor.factory(req.body);
const serialization = await executor.execute(DgraphConnectionType.DIRECT);
res.status(serialization.statusCode).send(serialization);
})
);
As you may recall from the Simplifying Query Execution section the DgraphQueryExecutor.executeJsonApiRequest() method passes the current DgraphQueryExecutor instance in JSON format to the /api/json API endpoint before handling the response.
// File: packages/dgraph-query-manager/src/classes/DgraphQueryExecutor.ts
export class DgraphQueryExecutor implements DgraphQueryExecutorInterface {
/**
* Makes an API query request via JSON payload.
*/
async executeJsonApiRequest(): Promise<Serialization> {
const response = new Serialization({
message: `Failed to retrieve ${
this.query.objectType
} via JSON API request.`,
request: this.query.query,
});
// Get URL
const url = `${config.dgraph.api.protocol}://${config.dgraph.api.host}:${
config.dgraph.api.port
}/api/json`;
try {
const axiosResponse = await axios.post(url, this);
logger.info(
`DgraphQueryExecutor.executeJsonApiRequest response %o`,
axiosResponse.data
);
response.response = axiosResponse.data.response;
response.success = true;
} catch (error) {
logger.error(error);
response.error = error;
}
return response;
}
}
The first Routes.post('/json', ...) method invocation in the Routes.ts file is where that request is handled. It does so in a fairly straight-forward fashion. It first creates a new Query instance by calling the Query.factory() method and passing in Partial<Query> parameters. It then uses that Query instance to modify the req.body – which is itself a DgraphQueryExecutor instance transmitted in JSON – providing the DgraphQueryExecutor instance an associated Query it can execute. After creating a valid instance using the DgraphQueryExecutor.factory() method it invokes the executor.execute() method and explicitly requires a DgraphConnectionType.DIRECT connection type, which forces the executor to perform its query execution directly with Dgraph, rather than going through an API. Simple, but effective.
While a production application would dramatically clean up the JSON payload that is sent to this /api/json endpoint to reduce the payload size it still functions rather elegantly here and provides a nice way to reuse our existing Query instances within the API. This should illustrate how easy it would be to expand on this “middleware”-style API by acting as a go-between for a primary client app and the Dgraph back-end that’s handling actual data transactions and retrieval.
Dynamically Generating Express Routes
The second part of the Routes.ts file is the createQueryRoutes() function, which dynamically generates all the ExpressJS routes our application needs, as defined in the packages/dgraph-query-manager/src/classes/Queries directory.
// File: api/src/routes/Routes.ts
/**
* Dynamically generates routes from Queries object and maps them to appropriate
* Express HTTP methods and DgraphQueryExecutors.
*/
const createQueryRoutes = () => {
for (const category in Queries) {
if (Queries.hasOwnProperty(category)) {
for (const key in Queries[category]) {
if (Queries[category].hasOwnProperty(key)) {
const query = Queries[category][key];
const route = query.route;
const wrapper = asyncWrapper(async (req, res) => {
let params;
if (query.paramTypes) {
// Map passed req.params to new params object using paramTypes array.
params = Object.assign(
{},
...query.paramTypes.map(paramType => ({
[paramType.key]: req.params[paramType.key.replace('$', '')],
}))
);
}
const executor = new DgraphQueryExecutor(query, params);
// Use direct connection type to avoid loop.
const serialization = await executor.execute(
DgraphConnectionType.DIRECT
);
res.status(serialization.statusCode).send(serialization);
});
switch (query.httpMethod) {
case HttpMethods.DELETE: {
Routes.delete(route, wrapper);
break;
}
case HttpMethods.GET: {
Routes.get(route, wrapper);
break;
}
case HttpMethods.POST: {
Routes.post(route, wrapper);
break;
}
case HttpMethods.PUT: {
Routes.put(route, wrapper);
break;
}
default: {
Routes.get(route, wrapper);
}
}
}
}
}
}
};
createQueryRoutes();
To understand this code let’s briefly look at how one of our queries is instantiated. The Queries.Search.searchBy Query is a dynamic query that performs a lookup of the passed $query value within the $predicate using the $function type of function.
// File: packages/dgraph-query-manager/src/classes/Queries/SearchQueries.ts
export const SearchQueries = {
/**
* Dynamic search based on passed function, predicate, and query.
*/
searchBy: new Query(
`query find($query: string) {
data(func: $function($predicate, $query))
{
uid
expand(_all_)
{
uid
expand(_all_)
}
}
}`,
'/search/by/:function/:predicate/:query',
[
new ParamType('$function', TypeOf(String), true),
new ParamType('$predicate', TypeOf(String), true),
new ParamType('$query', TypeOf(String)),
]
),
};
As mentioned in the Organizing Queries section one advantage to creating the Query class is to provide some additional helper functionality. In the case of the searchBy Query, the first two ParamTypes passed to it have a third argument of true, which tells the constructor that these parameters are substitute values. That is, before sending the query string to Dgraph the $function and $predicate placeholder values within the query string are replaced with the parameter values passed to the DgraphQueryExecutor that is invoking this Query. This allows us to create some powerful, dynamic queries at runtime with very little overhead.
For example, let’s create a new DgraphQueryExecutor instance and pass in the Queries.Search.searchBy Query and the following parameters.
const executor = new DgraphQueryExecutor(Queries.Search.searchBy, {
$function: 'anyoftext',
$predicate: 'tweet.text',
$query: 'solid',
});
const serialization = await executor.execute();
The actual query that Dgraph receives would be as follows.
query find($query: string) {
data(func: anyoftext(tweet.text, $query))
{
uid
expand(_all_)
{
uid
expand(_all_)
}
}
}
The reason we don’t need to substitute the $query parameter in our business logic is that it’s a GraphQL Variable which GraphQL+- can accept and substitute at runtime. However, since GraphQL+- cannot dynamically substitute things like function names or predicates, we’re able to use the above technique to accomplish that as well.
The final result is the query seen below.
query find($query: string) {
data(func: anyoftext(tweet.text, "solid"))
{
uid
expand(_all_)
{
uid
expand(_all_)
}
}
}curl http://127.0.0.1:8080/query -XPOST -d '
query find($query: string) {
data(func: anyoftext(tweet.text, "solid"))
{
uid
expand(_all_)
{
uid
expand(_all_)
}
}
}' | python -m json.tool | less
package main

import (
  "context"
  "flag"
  "fmt"
  "log"
  "github.com/dgraph-io/dgraph/client"
  "github.com/dgraph-io/dgraph/protos/api"
  "google.golang.org/grpc"
)

var (
  dgraph = flag.String("d", "127.0.0.1:9080", "Dgraph server address")
)

func main() {
  flag.Parse()
  conn, err := grpc.Dial(*dgraph, grpc.WithInsecure())
  if err != nil {
    log.Fatal(err)
  }
  defer conn.Close()


  dg := client.NewDgraphClient(api.NewDgraphClient(conn))


  resp, err := dg.NewTxn().Query(context.Background(), `blahblah`)

  if err != nil {
    log.Fatal(err)
  }
  fmt.Printf("Response: %s\n", resp.Json)
}Back to the createQueryRoutes() function above. It loops through every Query in the Queries object found in packages/dgraph-query-manager/src/classes/Queries/index.ts, which itself assigns sub-categories to search, tweet, and user queries. For each Query entry it finds it creates an asynchronous wrapper callback that will be invoked when the matching Query.route REST endpoint is hit via ExpressJS.
Within this async wrapper, it generates the params object based on the passed params extracted from the API endpoint query params. For example, ExpressJS likes params in a /:param format, so the wrapper function extrapolates based on the known Query.paramTypes what to extract from the API endpoint URL. With the params in hand, the last step is just to create a new DgraphQueryExecutor instance into which the query and the newly-generated params are passed. Finally, it executes the DgraphQueryExecutor with a DgraphConnectionType.DIRECT connection, which will result in a call to the DgraphQueryExecutor.executeDirectRequest() method. As we saw in the Simplifying Query Execution section this method invokes a direct Dgraph transaction through the dgraph-js-http library and returns a Serialization result.
Believe it or not, that’s all there is to our entire API app! While much of the logic is handled elsewhere, such as the dgraph-query-manager package, it’s still relatively simple to create an Express-based API that can serve multiple types of data and calls, including JSON payloads and RESTful endpoints.
In the next sections we’ll explore how we handle state management and create the client application within the popular React framework. We’ll make heavy use of the new React Hooks feature added in February of this year, which will help us manage both local and global state across our Twitter clone app, so we can query Dgraph directly or via our API.
Handling Application State
State management is one of the most difficult and initially confusing aspects of a new React app, so in this section we’ll see how the new React Hooks feature added to React in early 2019 can be used to create a stateful and elegant single-page application powered by a Dgraph database for fast and efficient data management. Let’s dive in!
You are encouraged to install the dgraph-twitter-clone/client application in a local dev environment so you can test it out and see the code in action as we walk through it. If you haven’t done so, feel free to check out the installation instructions. Alternatively, if you already installed the dgraph-twitter-clone repo and have Dgraph up and running, you can start the client app by executing the npm start or yarn start command from the dgraph-twitter-clone/client directory.
dgraph-twitter-clone/client was created by a programmer who is a rather poor designer, so this project is definitely function over form. To that end, the basic React app was bootstrapped using create-react-app, which creates a skeleton React app with most of the build tools added and handled out of the box. The look and styling are largely based on Bootstrap, which only seems appropriate given that this is a Twitter clone. Ultimately, as discussed in the introduction, the goal of the client app is to illustrate how easily a graph database like Dgraph can integrate into a modern Twitter-like application, and how much power its many features such as GraphQL+- queries bring to the table.
Instantiating the App
Let’s start looking through the client code at the top where our app is initialized, and we’ll work our way down from there. The client/src/index.tsx file invokes the React app and renders the primary App component, which is found in client/src/App.tsx.
// File: client/src/index.tsx
import React from 'react';
import ReactDOM from 'react-dom';
import './index.css';
import App from './App';
ReactDOM.render(<App />, document.getElementById('root'));
// File: client/src/App.tsx
// Components
import Main from './components/Main/Main';
// Hooks
// Layout
import './App.css';
// Libs
import { BrowserRouter } from 'react-router-dom';
import React from 'react';
// Local
import { Reducer } from './reducers';
import { InitialState, StateProvider } from './state';
// Fonts
import { library } from '@fortawesome/fontawesome-svg-core';
import { far } from '@fortawesome/free-regular-svg-icons';
import { fas } from '@fortawesome/free-solid-svg-icons';
library.add(far);
library.add(fas);
const App = () => {
return (
<BrowserRouter>
<StateProvider initialState={InitialState} reducer={Reducer}>
<Main />
</StateProvider>
</BrowserRouter>
);
};
export default App;
The App component wraps our entire application in the BrowserRouter component middleware, which comes from the react-router-dom package and allows us to perform routing by rendering certain components based on requested URL paths. We’ll get into that more in just a moment.
Adding a State Provider
The StateProvider component is a custom component based on this post and code by Luke Hall.
// File: client/src/state/StateProvider.tsx
/**
* Author: Luke Hall
* Source: https://medium.com/simply/state-management-with-react-hooks-and-context-api-at-10-lines-of-code-baf6be8302c
*/
import React, { createContext, useContext, useReducer } from 'react';
import { InitialState } from './State';
export const StateContext = createContext(InitialState);
export const StateProvider = ({ reducer, initialState, children }) => (
<StateContext.Provider value={useReducer(reducer, initialState)}>
{children}
</StateContext.Provider>
);
export const useStateContext = () => useContext(StateContext);
This component provides global state throughout the application by using the useContext React hook. Context is how React handles “global” state. As the React Context.Provider documentation shows, a context provider passes its value down to any child components that consume it. This is often a sleeker pattern to passing down large chains of props through a big component tree.
In the StateProvider component above, we’re passing the returned values from the useReducer React hook down to the child components to consume. useReducer() is similar to the useState() hook, except it works with the reducer + action + dispatcher pattern found in common React libraries like Redux. Why use reducers instead of directly modifying state? The primary advantage is a separation of concerns. Rather than allowing our state to be directly mutable, we can instead dispatch a series of actions that tell the reducer to change the state in some way.
Working with Actions and Reducers
To understand how actions and reducers work in conjunction to change our application state let’s first look at how we’re storing our state throughout most of our app. This is accomplished in the client/src/state/State.ts file.
// File: client/src/state/State.ts
import { Tweet, User } from 'dgraph-query-manager';
export const InitialState: any = {
authUser: undefined,
searchResults: undefined,
user: undefined,
tweets: [],
};
export interface StateInterface {
authUser: User | undefined;
searchResults: any;
user: User | undefined;
tweets: Tweet[];
}
export class State implements StateInterface {
authUser: User | undefined;
searchResults: undefined;
user: User | undefined;
tweets: Tweet[];
}
As you can see, we’ve defined a StateInterface with a handful of properties and we implement that StateInterface in the State class. We’re also importing the User and Tweet models from dgraph-query-manager since we want to use those model objects throughout the application. The properties of State don’t mean a lot right now, but we’ll mutate the values of this class in our reducer below based on changes within the app.
Next let’s look at the potential actions our reducer can expect, which are found in the client/src/reducers/base/Action.ts file.
// File: client/src/reducers/base/Action.ts
export enum ActionType {
SET_AUTHENTICATED_USER,
SET_SEARCH_RESULTS,
SET_USER,
SET_TWEETS,
UPDATE_TWEET,
TOGGLE_TWEET_PROPERTY,
}
export interface ActionInterface {
payload: any | undefined;
type: ActionType;
}
export class Action implements ActionInterface {
payload: any | undefined;
type: ActionType;
constructor(type: ActionType, payload?: any) {
this.type = type;
this.payload = payload;
}
}
As mentioned above, the purpose of a reducer to change state is that it accepts an action and, based on what that action tells it, makes changes to the state. Critically, a reducer is meant to be idempotent, meaning repeated calls to the same reducer with the same arguments should always result in the same outcome. Another common term for this type of code is a pure function. Simply put, your reducer logic should have no side effects.
So, our simple Action class accepts an ActionType, which is an enum of explicit options. It also accepts an optional payload, which will be used for additional parameters when necessary.
Now let’s see how the reducer uses our Action and State class to mutate application state by checking out client/src/reducers/base/Reducer.ts.
// File: client/src/reducers/base/Reducer.ts
import { Action, ActionType } from './Action';
import { State } from '../../state/';
import { Uid } from 'dgraph-query-manager';
import * as _ from 'lodash';
export const Reducer = (state: State, action: Action): State => {
switch (action.type) {
case ActionType.SET_AUTHENTICATED_USER: {
return {
...state,
authUser: action.payload,
};
}
case ActionType.SET_SEARCH_RESULTS: {
return {
...state,
searchResults: action.payload,
};
}
case ActionType.SET_USER: {
return {
...state,
user: action.payload,
};
}
case ActionType.UPDATE_TWEET: {
if (!state.tweets) return state;
const index = state.tweets.findIndex(
tweet => tweet.uid === action.payload.uid
);
const tempTweets = state.tweets;
// Update passed Tweet.
tempTweets[index] = action.payload;
return {
...state,
tweets: tempTweets,
};
}
case ActionType.SET_TWEETS: {
return {
...state,
// If array, sort in descending order.
tweets: Array.isArray(action.payload)
? action.payload.sort(
(a, b) =>
+new Date(b['tweet.createdAt']) -
+new Date(a['tweet.createdAt'])
)
: [action.payload],
};
}
case ActionType.TOGGLE_TWEET_PROPERTY: {
const isEnabled = action.payload.isEnabled;
const property = action.payload.property;
const tweet = action.payload.tweet;
const user = action.payload.user;
const clone = _.clone(tweet);
if (!_.has(clone, property)) {
clone[property] = [];
} else if (!_.isArray(clone[property])) {
clone[property] = [clone[property]];
}
if (isEnabled) {
clone[property].push(user);
} else {
clone[property] = _.reject(
clone[property],
other =>
new Uid(other.uid).toString() === new Uid(user.uid).toString()
);
}
return {
...state,
tweets: _.map(state.tweets, original => {
return original.uid.toString() === tweet.uid.toString()
? clone
: original;
}),
};
}
default: {
return state;
}
}
};
The Reducer class accepts two arguments: the current State and an Action instance. Based on the ActionType of the passed Action it modifies the state in some way and returns the new state object. Nothing too crazy going on here.
Now, if we look back at the StateProvider component, and specifically how it passes the returned values from useReducer() as the StateProvider.Provider value, you can start to see what’s going on.
// File: client/src/state/StateProvider.tsx
export const StateContext = createContext(InitialState);
export const StateProvider = ({ reducer, initialState, children }) => (
<StateContext.Provider value={useReducer(reducer, initialState)}>
{children}
</StateContext.Provider>
);
export const useStateContext = () => useContext(StateContext);
A call to the useReducer() hook returns two values: The current state and a dispatch function. The dispatch function is invoked whenever you need to call the reducer and pass it a new action to perform. We’ll go over this component in more detail in the TweetBox section, but here is a snippet from that component code that shows how we’re retrieving State properties. After destructuring the tweets state value we later call the dispatch function and pass in a new Action instance to inform the reducer what it should do – in this case, to SET_TWEETS to the array passed as the payload argument.
// File: client/src/components/Tweet/TweetBox.tsx
const [{ authUser, user, tweets }, dispatch] = useStateContext();
// ...
dispatch(
new Action(ActionType.SET_TWEETS, [...tweets, serialization.response])
);
Creating the Client App
Diving into our actual component logic we’ll start with the Main component, which we saw in Instantiating the App is a direct child of StateProvider, which itself a child of our base App component. Therefore, Main is where all our actual layout and logic begin. Here we see the client/src/components/Main/Main.tsx component.
// File: client/src/components/Main/Main.tsx
// Components
import ProfileCard from '../Profile/ProfileCard';
import Search from '../Search/Search';
import TweetBox from '../Tweet/TweetBox';
import TweetList from '../Tweet/TweetList';
import NavigationBar from '../Navigation/NavigationBar';
// Layout
import { Col, Container, Row } from 'react-bootstrap';
// Libs
import React from 'react';
import { DgraphQueryExecutor, Queries } from 'dgraph-query-manager';
// Local
import { useDgraphGlobal } from '../../hooks/';
import { Route, Switch } from 'react-router-dom';
import { Action, ActionType } from '../../reducers/';
import config from '../../config';
import TweetModal from '../Tweet/TweetModal';
import Following from '../Profile/Following';
import Followers from '../Profile/Followers';
const Main = () => {
// Default auth user
const executor = new DgraphQueryExecutor(Queries.User.findFromEmail, {
$email: config.user.defaultAuthEmail,
});
const [isLoading, response] = useDgraphGlobal({
executor,
action: new Action(ActionType.SET_AUTHENTICATED_USER),
dependencies: [config.user.defaultAuthEmail],
});
return (
<Container>
<Route path={'/:screenName/status/:tweetUid'} component={TweetModal} />
<NavigationBar />
<Container className="AppContainer">
<Row>
<Col sm={4}>
<Switch>
<Route path={'/'} exact component={ProfileCard} />
<Route path={'/search'} exact component={Search} />
<Route path={'/:screenName'} component={ProfileCard} />
</Switch>
</Col>
<Col>
<TweetBox />
<Switch>
<Route path={'/:screenName/followers'} component={Followers} />
<Route path={'/:screenName/following'} component={Following} />
<Route
path={[
'/',
'/:screenName',
'/search',
'/:screenName/status/:tweetUid',
]}
component={TweetList}
/>
</Switch>
</Col>
</Row>
</Container>
</Container>
);
};
export default Main;
Anything that is to be rendered by a component must be included in its return value, so all business logic prior to rendering occurs above the return within a given function component. In this case, we start by instantiating a new DgraphQueryExecutor, which you can learn more about in the Simplifying Query Execution section. The User.findFromEmail Query lets us find a user by email, and we’re passing a static value defined in config.user.defaultAuthEmail. Obviously, in a production application, this would be obtained from the user during login authentication, or perhaps from a session cookie. In this case, we don’t bother adding user authentication logic to the app since it’s unnecessary, so we’re just hard-coding authentication for a single, specific user.
To accomplish this we’re invoking a custom React hook called useDgraphGlobal, which can be found in the client/src/hooks/dgraph/useDgraphGlobal.ts file.
// Helpers
import { logger } from '../../helpers';
// Local
import { useStateContext } from '../../state';
// Libs
import { useEffect, useState } from 'react';
import { DgraphQueryExecutor, Serialization } from 'dgraph-query-manager';
import config from '../../config';
import { Action } from '../../reducers/';
/**
* Custom React hook that performs the heavy lifting of data retrieval from Dgraph and uses global state.
* Accepts a DgraphQueryExecutor and Action.
* The Executor is executed and the result is attached to an Action which is dispatched to global state reducer.
*
* @param parameters.executor Executor to be executed.
* @param parameters.action Action to be dispatched to reducer based on executor response.
* @param parameters.dependencies Values that will trigger a re-render upon change.
* @param parameters.invalid Determines if this hook is invalid.
* @param parameters.allowFailure Allows failed result to still be dispatched to state.
*/
export const useDgraphGlobal = (parameters: {
executor: DgraphQueryExecutor;
action: Action;
dependencies: any;
invalid?: boolean;
allowFailure?: boolean;
}): [boolean, Serialization] => {
const {
executor,
action,
dependencies,
invalid,
allowFailure = false,
} = parameters;
const [isLoading, setIsLoading]: [boolean, Function] = useState(false);
const [response, setResponse]: [any, Function] = useState(undefined);
// STATE
const [, dispatch]: [any, Function] = useStateContext();
// Call useEffect unconditionally.
useEffect(() => {
// Confirm validity
if (!invalid) {
executor
.execute()
.then(serialization => {
setIsLoading(false);
if (config.debug) {
logger.info(
`Serialized Response - action: %o, serialization: %o`,
action,
serialization
);
console.log(serialization);
}
if (serialization.success || allowFailure) {
action.payload = serialization.response;
dispatch(action);
setResponse(serialization.response);
}
})
.catch(exception => {
logger.error(exception);
setIsLoading(false);
});
} else {
setIsLoading(true);
logger.info(`Loading...`);
}
}, dependencies);
return [isLoading, response];
};
The function documentation somewhat explains what’s going on here, but the basic idea is this hook is passed a DgraphQueryExecutor and an Action. The executor is executed and the result, which is always a Serialization instance, is assigned to the action.payload. We then dispatch() that action obtained by calling the useStateContext() hook.
Something new here we haven’t discussed yet is React’s useEffect() method. If you’re familiar with React you may know that React class components rely upon built-in class methods to handle lifecycle events. These methods are componentDidMount(), componentDidUpdate(), and componentWillUnmount(). Each of those methods is automatically triggered at the appropriate moment in the component’s lifecycle. You can read more about the React component lifecycle in the official documentation, but for now just consider that those three methods are different moments in a component lifecycle, so handling component state within a class component often requires placing the right logic within the correct componentDid/Will method.
However, with React hooks we can replace the need for all three of the above methods with the useEffect() hook. The purpose of useEffect() is to trigger side effects after the component renders. Typically, such side effects are actions that may impact the component in some way, but that are not necessary for initial rendering to take place. A good example is data retrieval, which is often a delayed process that requires an async/await contract to be fulfilled. You typically don’t want to trigger such effects inside the rendering logic of your component, so adding those to the lifecycle event methods for class components (or inside useEffect() for function components) is ideal – those effects are free to execute after rendering and only make further updates when a change is required.
Referring back to our useDgraphGlobal() hook above, we see the useEffect() call starts by checking for validity (a special argument that was needed elsewhere in the app). It then executes the passed executor. Upon successful execution the serialization.response property is assigned to the action.payload and then the action is dispatched to our main reducer class we looked at before. We also call a useState() hook to assign a response value outside of the useEffect() method. This response object (which is the serialization.response we received inside the effect) is returned by useDgraphGlobal().
Promise.then().catch() block here, where elsewhere in the app we’ve typically used async/await. The reason for this is that, unfortunately, useEffect() hooks cannot accept async functions – that is, a Promise cannot be passed as an argument to a useEffect() call. Therefore, we use the next best thing which is calling an async function within the useEffect() anon function logic. The React team is working on adding data fetching capabilities through a feature called Suspense, which will be the preferred way to handle such retrieval in the future, but unfortunately Suspense for data fetching is not ready at time of writing.
Handling Global Dgraph State
Back to our Main component, we can re-examine how the custom useDgraphGlobal() hook is used here.
// File: client/src/components/Main/Main.tsx
// ...
const Main = () => {
// Default auth user
const executor = new DgraphQueryExecutor(Queries.User.findFromEmail, {
$email: config.user.defaultAuthEmail,
});
const [isLoading, response] = useDgraphGlobal({
executor,
action: new Action(ActionType.SET_AUTHENTICATED_USER),
dependencies: [config.user.defaultAuthEmail],
});
// ...
};
The DgraphQueryExecutor we pass is configured to execute the User.findFromEmail for our explicit email. The Action argument of new Action(ActionType.SET_AUTHENTICATED_USER) tells the Reducer class how it should change our global State based on the result of the executor.
// File: client/src/reducers/base/Reducer.ts
// ...
export const Reducer = (state: State, action: Action): State => {
switch (action.type) {
case ActionType.SET_AUTHENTICATED_USER: {
return {
...state,
authUser: action.payload,
};
}
}
// ...
};
Here we see that the Reducer merely creates a new shallow copy of the State object, but first assigns the authUser property to the action.payload value, which itself was assigned to the executor’s Serialization.response value. This logical structure makes it very simple to add new global state to our application in a few short steps:
- Add a new property to the
Stateclass. - Add a new type to the
ActionTypeenum. - Add a case to the
Reducerlogic for the newActionType.
That’s it! While all the state properties we’re currently using are at the same “level”, if we wanted to modify nested children of higher state properties we could start breaking out our Reducer into multiple sub-reducers and then combining the final state at the end.
Routing with React Router DOM
The react-router-dom library handles routing similarly to ExpressJS. Our Main component renders a handful of Route components that are each passed a few properties.
// File: client/src/components/Main/Main.tsx
// ...
return (
<Container>
<Route path={'/:screenName/status/:tweetUid'} component={TweetModal} />
<NavigationBar />
<Container className="AppContainer">
<Row>
<Col sm={4}>
<Switch>
<Route path={'/'} exact component={ProfileCard} />
<Route path={'/search'} exact component={Search} />
<Route path={'/:screenName'} component={ProfileCard} />
</Switch>
</Col>
<Col>
<TweetBox />
<Switch>
<Route path={'/:screenName/followers'} component={Followers} />
<Route path={'/:screenName/following'} component={Following} />
<Route
path={[
'/',
'/:screenName',
'/search',
'/:screenName/status/:tweetUid',
]}
component={TweetList}
/>
</Switch>
</Col>
</Row>
</Container>
</Container>
);
// ...
The path property matches any path that the path-to-regexp dependency package understands. If a match is detected then the Route acts upon that based on the additional properties it was provided. For example, <Route path={'/'} exact component={ProfileCard} /> will only match the root path (/) and, if a match is found, it will render the ProfileCard component. Typically, every matching Route will render. However, the Switch component that wraps the trio of Routes above will only render the first matching Route in the set, ignoring any remaining Routes below it. In this case, we’re first checking if the user is at the root path. We have to use the exact property here because, otherwise, any Route with a path that starts with / will also match. If the user isn’t at the root path then we check if they are at /search. If there’s still no match, we finally assume the extra URI content following the root path / is a user screenName (just like Twitter URLs), so we match that and render the ProfileCard component.
Managing Top-Level Navigation
Our navigation components consist of the NavigationBar and its single child component, SearchBox.
Navigation Bar
The NavigationBar component is just a simple Bootstrap nav bar that serves little purpose except as a home for our SearchBox component.
// File: client/src/components/Navigation/NavigationBar.tsx
// Components
import { Nav, Navbar } from 'react-bootstrap';
// Libs
import React from 'react';
import SearchBox from './SearchBox';
const NavigationBar = () => {
return (
<Navbar bg="light" fixed="top">
<Navbar.Brand href="/">Dgraph + Twitter</Navbar.Brand>
<Navbar.Toggle aria-controls="basic-navbar-nav" />
<Navbar.Collapse key="basic-navbar-nav">
<Nav className="mr-auto" />
<SearchBox />
</Navbar.Collapse>
</Navbar>
);
};
export default NavigationBar;
Search Box
The SearchBox component is primarily an input that uses local state and a feature of react-router-dom to redirect the user to our /search endpoint based on their search query.
// File: client/src/components/Navigation/SearchBox.tsx
import React, { useState } from 'react';
import { Button, Form, FormControl } from 'react-bootstrap';
import { withRouter } from 'react-router-dom';
const SearchBox = ({ history }) => {
const [currentText, setCurrentText] = useState('');
const handleInputChange = event => {
// Destructure textbox `value` field.
const { value } = event.target;
// Update params
setCurrentText(value);
};
return (
<>
<Form
inline
onSubmit={async event => {
event.preventDefault();
if (!currentText || currentText.length === 0) {
return;
}
// Redirect to search path.
history.push(`/search?q=${currentText}`);
}}
>
<FormControl
id={'text'}
className={'mr-sm-2'}
placeholder={'Search Twitter'}
type={'text'}
value={currentText}
onChange={handleInputChange}
/>
<Button variant={'outline-success'} type={'submit'}>
Search
</Button>
</Form>
</>
);
};
export default withRouter(SearchBox);
We start by creating a local currentText state that is initialized to an empty string. The form invokes handleInputChange() when the text value changes, which assigns the new value to our currentText state. The Form.onSubmit() event starts by preventing the default behavior, which is critical to do at the beginning of many React component event callbacks. To perform a redirect we use the history prop that was provided to the SearchBox component props object because we wrapped the caller at the bottom in withRouter from react-router-dom. This trick let’s us perform a simple redirect by adding a new entry to the history stack. In this case, we want to perform a search so we redirect to our /search?q= endpoint and include the currentText state value.
Creating a Search Component
The Search component is where things start to get rather interesting. We get to combine a lot of functionality from every aspect of our app to perform an efficient yet powerful search using a Dgraph query.
// File: client/src/components/Search/Search.tsx
import React from 'react';
import { DgraphQueryExecutor, Queries } from 'dgraph-query-manager';
import { useDgraphGlobal } from '../../hooks/dgraph';
import { Action, ActionType } from '../../reducers/base';
import { Card, Image } from 'react-bootstrap';
import { useStateContext } from '../../state';
const Search = ({ location }) => {
const [{ tweets }] = useStateContext();
const cleanupQueryString = (query: string | null) => {
let result;
if (query) {
result = query.replace('%23', '').replace('#', '');
}
return result;
};
const queryString = cleanupQueryString(
new URLSearchParams(location.search).get('q')
);
const executor = new DgraphQueryExecutor(Queries.Search.search, {
$query: queryString,
});
useDgraphGlobal({
executor,
action: new Action(ActionType.SET_TWEETS),
// Re-render if query changes.
dependencies: [queryString],
invalid: undefined,
// Accept empty results.
allowFailure: true,
});
return (
<Card className="SearchCard">
<Card.Body>
<div>
<p>
Search for <b>{queryString}</b> found {tweets ? tweets.length : 0}{' '}
results.
</p>
</div>
</Card.Body>
</Card>
);
};
export default Search;
Our component starts by calling the custom useStateContext() hook and destructuring the tweets property from it. This contains the global list of Tweets for our app, which is essentially used to render the main TweetList component we’ll see a bit later. In this case, the Search component will be updating that state and we’ll use the result to render a simple counter of how many tweets were returned from the search.
The DgraphQueryExecutor is using the Search.search Query which looks similar to the following.
query find($query: string) {
a as var(func: anyoftext(tweet.text, $query))
var(func: anyoftext(hashtag.hashtag, $query)) {
b as hashtags: ~tweet.hashtag
}
data(func: has(tweet.text)) @filter(uid(a) OR uid(b)) {
uid
expand(_all_) {
uid
expand(_all_)
}
}
}
The Query expects a $query parameter indicating what to search for, and looks in the tweet.text and hashtag.hashtag predicates for that text using one of GraphQL+-’s full-text search functions, anyoftext(). We want a result consisting only of tweet nodes, but since the hashtag nodes referenced in the tweet.hashtag edge are separate nodes we need to combine the results of our pre-search before obtaining the final result set. We accomplish this by using GraphQL+- var blocks, which are blocks that begin with the var keyword and which are not returned in the results. We combine that capability with value variables that are written in the form of varName as ... to obtain a temporary list of scalar values. In this case, Dgraph recognizes the results of our two var blocks are nodes. We assign those node uids to temporary variables a and b, and then use those collections as part of the @filter for our final query. The end result is that we return only the subset of tweet nodes that either have a tweet.text or a tweet.hashtag { hashtag.hashtag } predicate containing our search text.
To see this in action here we’ve got the above query looking for the search term user, which should return at least a handful of results in your local installation if you generated some dummy data during the app install.
{
a as var(func: anyoftext(tweet.text, "user"))
var(func: anyoftext(hashtag.hashtag, "user")) {
b as hashtags: ~tweet.hashtag
}
data(func: has(tweet.text)) @filter(uid(a) OR uid(b)) {
uid
expand(_all_) {
uid
expand(_all_)
}
}
}curl http://127.0.0.1:8080/query -XPOST -d '
{
a as var(func: anyoftext(tweet.text, "user"))
var(func: anyoftext(hashtag.hashtag, "user")) {
b as hashtags: ~tweet.hashtag
}
data(func: has(tweet.text)) @filter(uid(a) OR uid(b)) {
uid
expand(_all_) {
uid
expand(_all_)
}
}
}' | python -m json.tool | less
package main

import (
  "context"
  "flag"
  "fmt"
  "log"
  "github.com/dgraph-io/dgraph/client"
  "github.com/dgraph-io/dgraph/protos/api"
  "google.golang.org/grpc"
)

var (
  dgraph = flag.String("d", "127.0.0.1:9080", "Dgraph server address")
)

func main() {
  flag.Parse()
  conn, err := grpc.Dial(*dgraph, grpc.WithInsecure())
  if err != nil {
    log.Fatal(err)
  }
  defer conn.Close()


  dg := client.NewDgraphClient(api.NewDgraphClient(conn))


  resp, err := dg.NewTxn().Query(context.Background(), `blahblah`)

  if err != nil {
    log.Fatal(err)
  }
  fmt.Printf("Response: %s\n", resp.Json)
}The search query above uses another GraphQL+- feature called Reverse Edges. The tilde character preceding the tweet.hashtag predicate in the line b as hashtags: ~tweet.hashtag signifies that we’re querying the reverse edge between tweet.hashtag and hashtag.hashtag. To better illustrate this, take a look at the modified query below in which we’re only seeking tweets where tweet.hashtag shares an edge with a hashtag.hashtag node that contains the search term of user.
{
var(func: anyoftext(hashtag.hashtag, "user")) {
b as hashtags: ~tweet.hashtag
}
data(func: has(tweet.text)) @filter(uid(b)) {
uid
count(uid)
tweet.text
tweet.hashtag {
hashtag.hashtag
}
}
}curl http://127.0.0.1:8080/query -XPOST -d '
{
var(func: anyoftext(hashtag.hashtag, "user")) {
b as hashtags: ~tweet.hashtag
}
data(func: has(tweet.text)) @filter(uid(b)) {
uid
count(uid)
tweet.text
tweet.hashtag {
hashtag.hashtag
}
}
}' | python -m json.tool | less
package main

import (
  "context"
  "flag"
  "fmt"
  "log"
  "github.com/dgraph-io/dgraph/client"
  "github.com/dgraph-io/dgraph/protos/api"
  "google.golang.org/grpc"
)

var (
  dgraph = flag.String("d", "127.0.0.1:9080", "Dgraph server address")
)

func main() {
  flag.Parse()
  conn, err := grpc.Dial(*dgraph, grpc.WithInsecure())
  if err != nil {
    log.Fatal(err)
  }
  defer conn.Close()


  dg := client.NewDgraphClient(api.NewDgraphClient(conn))


  resp, err := dg.NewTxn().Query(context.Background(), `blahblah`)

  if err != nil {
    log.Fatal(err)
  }
  fmt.Printf("Response: %s\n", resp.Json)
}Here’s a sample of what that should return.
{
  "uid": "0x106f",
  "tweet.text": "@Jarred_Schiller82 viral enable experiences #User-friendly #Persistent",
  "tweet.hashtag": [
    {
      "hashtag.hashtag": "User"
    },
    {
      "hashtag.hashtag": "Persistent"
    }
  ]
}
Notice that our query is structured such that hashtag.hashtag is a child node of tweet.hashtag. However, we are searching for “parent” tweet nodes that contain hashtags with user text, so we use a reverse edge (~) to look at the relationship in the opposite direction as normal. In our Dgraph schema we added the @reverse directive to the tweet.hashtag predicate so Dgraph would automatically compute the reverse edge for us.
Back to the Search component logic. We saw how the client app uses the useDgraphGlobal() hook in the Handling Global Dgraph State section, but the call to that hook in the Search component has a few extra arguments to briefly discuss.
useDgraphGlobal({
  executor,
  action: new Action(ActionType.SET_TWEETS),
  // Re-render if query changes.
  dependencies: [queryString],
  invalid: undefined,
  // Accept empty results.
  allowFailure: true,
});
We know that the executor is executed and that the result is passed as a payload to the new Action which is a type of SET_TWEETS. The dependencies param is actually passed as the second argument to the underlying useEffect() method. When React re-renders a component in which useEffect() was called (due to a state change or what not), before the useEffect() function is invoked again React will first check the list of dependency arguments for changes in their value(s). If none of the dependencies have changed since the previous useEffect() invocation, React will not call the function passed to useEffect() after re-rendering the component. This is particularly useful when the side effect being called is not something that should be executed for every render.
So, in the case above our dependencies consist of just a single reference to our queryString value – in other words, the actual text that is being searched for during this render. In our query example above, queryString would be equal to user. Thus, after the Search component renders initially and executes the underlying useEffect() hook that’s part of our useDgraphGlobal() call, it will only trigger useEffect() again if the value of the queryString has changed. In other words, if a new search parameter is passed. Neato!
Setting allowFailure to true is useful when executing a query that may not return any results. Since this is a user-generated search query, we have to account for this possibility, so setting allowFailure to true for this call still passes the Serialization.response to our action.payload and updates the tweets state accordingly.
The only other minor thing to mention is the destructured location property, which is provided by react-router-dom. The location object contains a bit of useful information such as the current path, query params, and so forth. We use it here to extract the search property params, since the /search?q=user path contains the actual text being searched for.
Building a User Profile
Profile components provide basic user information for the currently authenticated or currently viewed user.
Profile Card
Let’s take a look at the ProfileCard component, which is the identification card along the left side of the app containing user-specific profile information.
// File: client/src/components/Profile/ProfileCard.tsx
// Components
import ProfileCardStats from './ProfileCardStats';
// Helpers
// Hooks
// Layout
import { Card, Image } from 'react-bootstrap';
// Libs
import { DgraphQueryExecutor, Queries } from 'dgraph-query-manager';
import React from 'react';
// Local
import { useStateContext } from '../../state';
import { useDgraphGlobal } from '../../hooks/';
import { Action, ActionType } from '../../reducers/';
import config from '../../config';

const ProfileCard = ({ match }) => {
  const screenName =
    match && match.params && match.params.screenName
      ? match.params.screenName
      : config.user.defaultAuthScreenName;

  const executorScreenName = new DgraphQueryExecutor(
    Queries.User.findFromScreenName,
    {
      $screenName: screenName,
    }
  );
  const [isScreenNameLoading, responseScreenName] = useDgraphGlobal({
    executor: executorScreenName,
    action: new Action(ActionType.SET_USER),
    // Re-render if match changes.
    dependencies: [screenName],
    // Invalid if screenName doesn't exist.
    invalid: !screenName,
  });

  const [{ user }] = useStateContext();

  const executorTweets = new DgraphQueryExecutor(Queries.Tweet.getAllForUser, {
    $id: user && user.uid ? user.uid.toString() : undefined,
  });
  const [isLoading, response] = useDgraphGlobal({
    executor: executorTweets,
    action: new Action(ActionType.SET_TWEETS),
    // Re-render if user changes.
    dependencies: [user],
    // Invalid if user doesn't exist.
    invalid: !user,
  });

  let content = <h3>Loading Profile</h3>;

  if (user) {
    const name = user['user.name'];
    const screenName = user['user.screenName'];
    content = (
      <Card className="ProfileCard">
        <a className="ProfileCard-bg" href={`/${screenName}`} />
        <Card.Body>
          <a href={`/${screenName}`} title={name}>
            <Image
              src={
                user['user.avatar']
                  ? user['user.avatar']
                  : 'https://www.gravatar.com/avatar/00000000000000000000000000000000'
              }
            />
          </a>

          <div>
            <div>
              <a href={`/${screenName}`}>{name}</a>
            </div>
            <span>
              <a href={`/${screenName}`}>
                <span>
                  @<b>{screenName}</b>
                </span>
              </a>
            </span>
          </div>

          <ProfileCardStats />
        </Card.Body>
      </Card>
    );
  } else {
    content = (
      <>
        <h3>No User Profile found.</h3>
      </>
    );
  }

  return content;
};

export default ProfileCard;
As you may recall one of the Routes in our Main component uses a path with a :screenName parameter and renders the ProfileCard if it matches.
<Route path={'/:screenName'} component={ProfileCard} />
Therefore, the ProfileCard component first destructures the match property provided by react-router-dom and checks to see if the screenName param exists. If not, it assumes we’ve matched the root path instead (/), which was also routed to render this component, and uses the static config.user.defaultAuthScreenName value instead. As we saw above, this static value is just used for demonstration purposes and would be retrieved from an authed user or session in a real-world app. The retrieved screenName value is then used in the User.findFromScreenName Query and that executor is passed to useDgraphGlobal to retrieve a matching User record with that particular user.screenName.
The ActionType.SET_USER causes our Reducer to update the State.user property with the retrieved value, so we also call the useStateContext() hook and destructure the user property to get whatever user is currently active. We then use another Query and executor to retrieve all Tweets for that user and dispatch it with the ActionType.SET_TWEETS action. It’s worth noting that we used the same ActionType in the Search component, which illustrates the power of making our components self-contained. Regardless of where in the app we update the global list of tweets, we can use the same process and it will always have the same impact on the rest of the app.
The actual rendered HTML of ProfileCard creates some basic profile structure for the user, including their avatar if applicable, and also renders the ProfileCardStats component.
Profile Card Stats
You may have noticed the ProfileCard component doesn’t pass any props to the ProfileCardStats component. Therefore, as you’ll see in the code, ProfileCardStats doesn’t expect a props argument.
// File: client/src/components/Profile/ProfileCardStats.tsx
// Components
// Hooks
// Layout
import { Col, Row } from 'react-bootstrap';
// Libs
import React from 'react';
import { useStateContext } from '../../state';

const ProfileCardStats = () => {
  const [{ user }] = useStateContext();

  let content = <h3>Loading Stats</h3>;

  if (user) {
    const screenName = user['user.screenName'];
    content = (
      <Row className="ProfileCardStat" noGutters={true}>
        <Col xs={3}>
          <a href={`/${screenName}`}>
            <span className="ProfileCardStat-title">Tweets</span>
            <span>{user['~tweet.user'] ? user['~tweet.user'].length : 0}</span>
          </a>
        </Col>
        <Col xs={4}>
          <a href={`/${screenName}/following`}>
            <span className="ProfileCardStat-title">Following</span>
            <span>
              {user['user.friends'] ? user['user.friends'].length : 0}
            </span>
          </a>
        </Col>
        <Col xs={5}>
          <a href={`/${screenName}/followers`}>
            <span className="ProfileCardStat-title">Followers</span>
            <span>
              {user['~user.friends'] ? user['~user.friends'].length : 0}
            </span>
          </a>
        </Col>
      </Row>
    );
  }

  return content;
};

export default ProfileCardStats;
Instead of using passed props we explicitly use global state via the useStateContext() hook. But why not just pass props, since ProfileCard is just up one level in the component tree and could easily do so? The simple answer is better future-proofing. For example, if ProfileCardStats expects some props passed to it that contain user and tweets data what happens when we move this component to somewhere else in the app structure? We’d have to adjust the immediate parent component, at the very least, to pass the props, and in some cases the component tree may get extremely long, requiring a massive chain of passed props. It’s for this very reason that the React team added context (i.e. global state), so we’re making use of it here as well.
Thankfully, by leaning on the work of other components to update our global state, the ProfileCardStats component doesn’t have to trigger any post-rendering effects – it just grabs the data it needs and renders its UI.
We’re also making heavy use of more reverse edges provided by Dgraph for user node predicates such as ~tweet.user and ~user.friends. These reverse edges retrieved from our query make it easy to determine the number of followers, friends, and tweets applicable to this user.
Handling User Components
Following and Followers
You may recall that the Main.tsx component contains a <Switch> rout to check for /:screenName/followers or /:screenName/following paths.
Switch>
  <Route path={'/:screenName/followers'} component={Followers} />
  <Route path={'/:screenName/following'} component={Following} />
  <Route
    path={[
      '/',
      '/:screenName',
      '/search',
      '/:screenName/status/:tweetUid'
    ]}
    component={TweetList}
  />
</Switch>
The Following and Followers components extract the :screenName and retrieve the applicable user from the database. Here’s the code for the client/src/components/User/Following.tsx component.
// File: client/src/components/User/Following.tsx
// Components
import UserGrid from './UserGrid';
// Helpers
import config from '../../config';
import { useStateContext } from '../../state';
// Hooks
import { Action, ActionType } from '../../reducers/base';
import { useDgraphGlobal } from '../../hooks/dgraph';
// Libs
import { DgraphQueryExecutor, Queries } from 'dgraph-query-manager';
import React from 'react';

const Following = ({ match }) => {
  const [{ user }] = useStateContext();
  const screenName =
    match && match.params && match.params.screenName
      ? match.params.screenName
      : config.user.defaultAuthScreenName;

  const executorScreenName = new DgraphQueryExecutor(
    Queries.User.findFromScreenName,
    {
      $screenName: screenName,
    }
  );
  const [isScreenNameLoading, responseScreenName] = useDgraphGlobal({
    executor: executorScreenName,
    action: new Action(ActionType.SET_USER),
    // Re-render if match changes.
    dependencies: [screenName],
    // Invalid if screenName doesn't exist.
    invalid: !screenName,
  });
  const friends = user && user['user.friends'];

  return (
    <>
      <h1>Following</h1>
      <UserGrid users={friends} />
    </>
  );
};

export default Following;
We use the screen name to set the global user state and if that value exists we pass the user['user.friends'] collection to the UserGrid component, which handles displaying a group of users in a flex grid.
UserGrid
The UserGrid component takes the passed users prop and splits the array into a collection of multi-dimensional arrays, each with a size equal to the columnCount constant.
// File: client/src/components/User/UserGrid.tsx
// Components
import UserCard from './UserCard';
// Helpers
// Hooks
// Layout
import Row from 'react-bootstrap/es/Row';
// Libs
import React from 'react';

const UserGrid = ({ users }) => {
  const columnCount = 3;

  if (users) {
    // Split users into array of arrays equal to column count.
    const rows = [...Array(Math.ceil(users.length / columnCount))].map(
      (row, index) =>
        users.slice(index * columnCount, index * columnCount + columnCount)
    );
    return (
      <>
        {rows.map((row, index) => (
          <Row key={index}>
            {row.map(user => (
              <UserCard key={user.uid} user={user} />
            ))}
          </Row>
        ))}
      </>
    );
  } else {
    return <h3>No Users found.</h3>;
  }
};

export default UserGrid;
This takes advantage of our flex grid capabilities by splitting the full users array into sub-sets of columnCount number of users per Row. From there, each user is passed to the UserCard component, which handles actual user display.
UserCard
The UserCard component uses the passed user prop to create a Card element with basic user information such as the avatar and screen name.
// File: client/src/components/User/UserCard.tsx
// Components
// Layout
import './UserCard.css';
import { Card, Image } from 'react-bootstrap';
// Libs
import React from 'react';

const UserCard = ({ user }) => {
  let content = <h3>Loading User</h3>;

  if (user) {
    const name = user['user.name'];
    const screenName = user['user.screenName'];

    content = (
      <Card className="UserCard col-sm-4">
        <Card.Body>
          <a href={`/${screenName}`} title={name}>
            <Image
              src={
                user['user.avatar']
                  ? user['user.avatar']
                  : 'https://www.gravatar.com/avatar/00000000000000000000000000000000'
              }
            />
          </a>
          <div>
            <div>
              <a href={`/${screenName}`}>{name}</a>
            </div>
            <span>
              <a href={`/${screenName}`}>
                <span>
                  @<b>{screenName}</b>
                </span>
              </a>
            </span>
          </div>
        </Card.Body>
      </Card>
    );
  } else {
    content = (
      <>
        <h3>No User found.</h3>
      </>
    );
  }
  return content;
};

export default UserCard;
With the combination of user components we’ve defined above we’re able to navigate to a /:screenName/followers or /:screenName/following path and look at the collection of users that the :screenName user is respectively friends with or following.
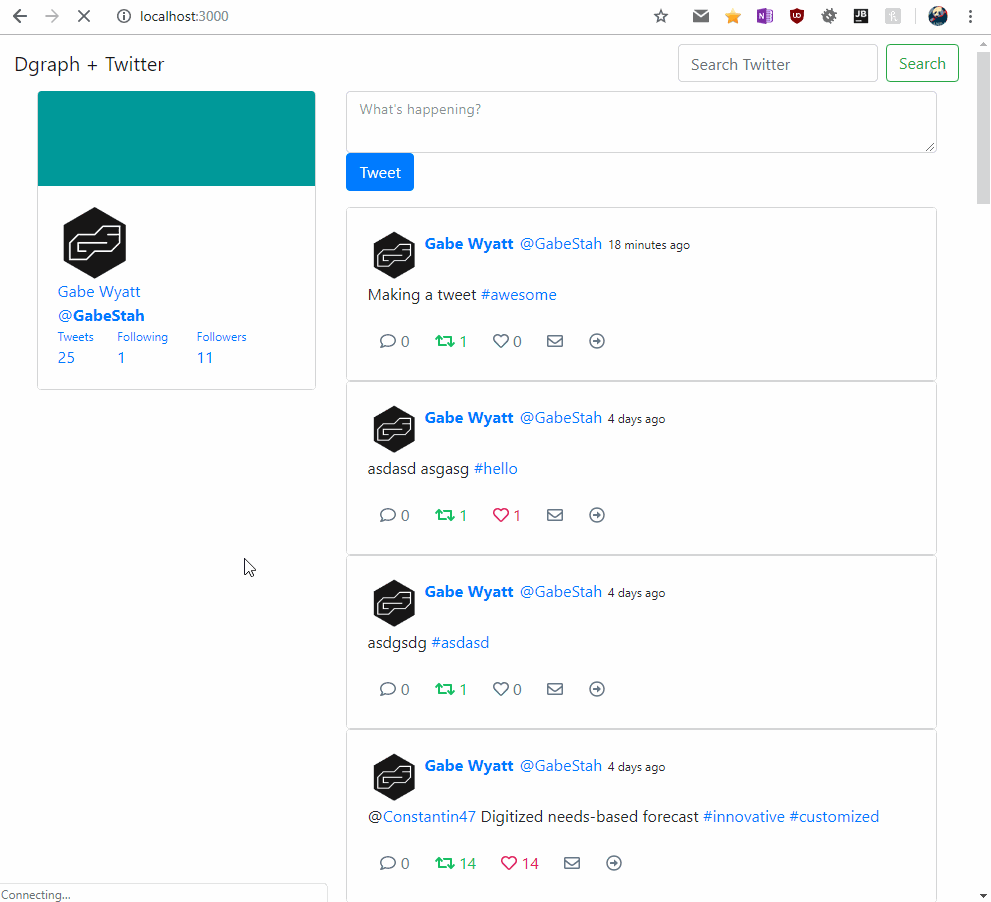
Creating the Tweet Components
The last set of components to go over are those that handle tweets. It’s generally a good idea to break functionality into smaller components whenever possible, so we have the TweetList component that contains a series of TweetCard components, which in turn contains a Tweet component. We also have the singular TweetBox component that the user uses to add new tweets. Finally, the TweetModal component which is used to simulate the singular modal view Twitter employs when viewing a specific tweet URL.
Tweet Box
Let’s start by looking at the TweetBox component, which is displayed at the top of the main content Container and allows the authenticated user to add new tweets.
// File: client/src/components/Tweet/TweetBox.tsx
// Components
import { Button, Form } from 'react-bootstrap';
// Local
import { useStateContext } from '../../state';
// Libs
import React, { useState } from 'react';
import { Tweet } from 'dgraph-query-manager';
import { Action, ActionType } from '../../reducers/';

const TweetBox = () => {
  const [{ authUser, user, tweets }, dispatch] = useStateContext();

  const initialFormState = {
    'tweet.text': '',
    'tweet.user': authUser,
  };
  const [currentTweet, setCurrentTweet] = useState(initialFormState);

  const handleInputChange = event => {
    // Destructure textbox `id` and `value` fields.
    const { id, value } = event.target;
    // Update currentTweet params
    setCurrentTweet({ ...currentTweet, [id]: value });
  };

  const handleSubmit = async event => {
    event.preventDefault();
    // Checks for valid authUser and valid currentTweet text.
    if (
      !authUser ||
      !authUser.uid ||
      !currentTweet ||
      currentTweet['tweet.text'].length === 0
    ) {
      return;
    }

    const serialization = await Tweet.upsert({
      'tweet.text': currentTweet['tweet.text'],
      'tweet.user': authUser,
    });

    // Tweet created
    if (serialization.success) {
      setCurrentTweet(initialFormState);
      // Only update tweet list if authUser equals viewed user.
      if (user && user.uid.toString() === authUser.uid.toString()) {
        dispatch(
          new Action(ActionType.SET_TWEETS, [...tweets, serialization.response])
        );
      }
    }
  };

  return (
    <Form className={'TweetBox'} onSubmit={handleSubmit}>
      <Form.Group>
        <Form.Control
          id={'tweet.text'}
          as={'textarea'}
          type={'textarea'}
          value={currentTweet['tweet.text']}
          placeholder={"What's happening?"}
          onKeyDown={async event => {
            // On enter
            if (event.keyCode === 13) await handleSubmit(event);
          }}
          onChange={handleInputChange}
        />
        <Button variant={'primary'} type={'submit'}>
          Tweet
        </Button>
      </Form.Group>
    </Form>
  );
};

export default TweetBox;
There’s a lot going on in the TweetBox component so we’ll break it down into chunks. We start by grabbing the authUser, user, and tweets global state values, along with the dispatch function for later use. We then set the currentTweet local state to an object containing empty tweet.text and setting the tweet.user property to the authUser. This local currentTweet state can then be used to track changes to the tweet box input.
Let’s skip down to the return render which is basically just a simple form with a textarea element and a submit button. Critically, we must set the value property of the textarea to the currentTweet['tweet.text'] state value, otherwise React won’t allow us to modify the text in the text box. The onChange event is handled by handleInputChange(), which uses the setCurrentTweet() function to set the local currentTweet state.
Meanwhile, the onKeyDown event checks if the Enter key was pressed, in which case it triggers submission, similar to the actual onSubmit form event.
The handleSubmit() function checks for a valid authUser and currentTweet, creates an object that matches properties of a Partial<Tweet> object, then passes those to the Tweet.upsert() method from the dgraph-query-manager package. If upsert was successful the tweet box is returned to its initial state. Finally, if the current user state matches the authUser, that means the TweetList component is displaying the list of tweets for the authorized user. In this case, we want to immediately update the tweets global state to reflect the new addition that was just upserted to the database, so we dispatch() the appropriate action and pass the new tweets list with the serialization.response (i.e. the created Tweet instance) added onto it.
user to the authUser should probably be refactored into a separate component or class, somewhere outside of TweetBox. It’s kept here just because our simple app doesn’t update that anywhere else, but a larger application would be wise to only allow the TweetBox to dispatch an action, while another section should actually determine what (if any) state data should be updated based on that.
Tweet List
Our TweetList component is short and sweet. It uses the tweets global state to render a list of TweetCard components.
// File: client/src/components/Tweet/TweetList.tsx
// Components
import TweetCard from './TweetCard';
// Helpers
// Hooks
// Libs
import React from 'react';
import { useStateContext } from '../../state';

const TweetList = () => {
  const [{ tweets }] = useStateContext();
  let content;

  if (tweets && Array.isArray(tweets) && tweets.length > 0) {
    content = tweets.map(tweet => <TweetCard key={tweet.uid} tweet={tweet} />);
  } else if (tweets && !Array.isArray(tweets)) {
    content = <TweetCard key={tweets.uid} tweet={tweets} />;
  } else {
    content = <h3>No Tweets found.</h3>;
  }

  return content;
};

export default TweetList;
If the tweets state is defined then we pass every tweet in the collection to a new TweetCard component instance, along with setting the key property to a unique value and passing each Tweet as a prop.
Tweet Card
The TweetCard component provides most of the structure and layout to each tweet in the UI and contains logic for determining tweet-specific stats like the number of replies, retweets, favorites, and so forth.
// File: client/src/components/Tweet/TweetCard.tsx
// Components
import Tweet from './Tweet';
// Layout
import './TweetCard.css';
import { Button, ButtonGroup, Card } from 'react-bootstrap';
// Libs
import React, { useEffect, useState } from 'react';
import { logger, numeral } from '../../helpers';
import {
  BaseModelDeletionMode,
  DgraphQueryExecutor,
  Queries,
  Uid,
  User,
} from 'dgraph-query-manager';
import * as _ from 'lodash';
// Font
import { FontAwesomeIcon } from '@fortawesome/react-fontawesome';
import { faRetweet } from '@fortawesome/free-solid-svg-icons';
import config from '../../config';
import { useStateContext } from '../../state';
import { Link } from 'react-router-dom';
import { Action, ActionType } from '../../reducers/base';

const TweetCard = ({ tweet }) => {
  const [{ authUser }, dispatch] = useStateContext();
  const [replies, setReplies]: [any, Function] = useState(undefined);
  const [, setIsLoading]: [boolean, Function] = useState(true);
  const [hasUserFavorited, setHasUserFavorited]: [boolean, Function] = useState(
    false
  );
  const [hasUserRetweeted, setHasUserRetweeted]: [boolean, Function] = useState(
    false
  );
  const [favoriteCount, setFavoriteCount]: [number, Function] = useState(0);
  const [retweetCount, setRetweetCount]: [number, Function] = useState(0);

  /**
   * Set replies.
   */
  useEffect(() => {
    if (!tweet) return;
    const params = {
      $id: tweet && tweet.uid ? tweet.uid.toString() : undefined,
    };
    const executor = new DgraphQueryExecutor(Queries.Tweet.getReplies, params);
    executor
      .execute()
      .then(serialization => {
        setIsLoading(false);
        if (serialization.success) {
          // Set replies to Array
          if (Array.isArray(serialization.response)) {
            setReplies(serialization.response);
          } else {
            setReplies(new Array(serialization.response));
          }
        }
      })
      .catch(exception => {
        logger.error(exception);
        setIsLoading(false);
      });
  }, [authUser, tweet]);

  useEffect(() => {
    if (!authUser || !authUser.uid || !tweet) return;

    const favorites = tweet['~user.favorites'];
    const retweets = tweet['~user.retweets'];

    setHasUserFavorited(
      _.isArray(favorites)
        ? _.some(
            favorites,
            other => other && other.uid === authUser.uid.toString()
          )
        : !!_.isObject(favorites)
    );
    setHasUserRetweeted(
      _.isArray(retweets)
        ? _.some(
            retweets,
            other => other && other.uid === authUser.uid.toString()
          )
        : !!_.isObject(retweets)
    );
    setFavoriteCount(
      _.isArray(favorites) ? favorites.length : _.isObject(favorites) ? 1 : 0
    );
    setRetweetCount(
      _.isArray(retweets) ? retweets.length : _.isObject(retweets) ? 1 : 0
    );
  }, [authUser, tweet]);

  /**
   * Check if currently authed User has replied to Tweet.
   */
  const hasAuthUserReplied = (): boolean => {
    if (!authUser || !replies || !authUser.uid) {
      return false;
    }
    return replies.some(reply => {
      if (authUser.uid && reply) {
        const replyUser = _.first(reply['tweet.user']);
        return (
          replyUser &&
          replyUser.uid &&
          replyUser.uid.toString() === authUser.uid.toString()
        );
      }
    });
  };

  /**
   * Toggle boolean field of Tweet.
   * @param property
   * @param event
   * @param enabled
   */
  const toggleBooleanField = async (
    property: string,
    event: any,
    enabled: any
  ) => {
    event.preventDefault();
    if (!tweet || !tweet.uid || !authUser || !authUser.uid) return;

    // Toggle current value.
    enabled = !enabled;
    if (enabled) {
      await User.insert({
        uid: new Uid(authUser.uid).toString(),
        [property]: {
          uid: new Uid(tweet.uid).toString(),
        },
      });
    } else {
      await User.delete(
        {
          uid: new Uid(authUser.uid).toString(),
          [property]: {
            uid: new Uid(tweet.uid).toString(),
          },
        },
        BaseModelDeletionMode.Raw
      );
    }

    dispatch(
      new Action(ActionType.TOGGLE_TWEET_PROPERTY, {
        isEnabled: enabled,
        // Reverse predicate for Tweets
        property: `~${property}`,
        tweet,
        user: authUser,
      })
    );
  };

  if (!tweet || !tweet.uid) return <></>;

  // Debug output Tweet Uid
  let debugElement;
  if (config.debug) {
    debugElement = <p>Uid: {tweet.uid.toString()}</p>;
  }

  return (
    <Card className="TweetCard">
      <Card.Body>
        <Tweet tweet={tweet} />
        <ButtonGroup>
          <Button
            className={'reply'}
            variant={'link'}
            active={hasAuthUserReplied()}
          >
            <FontAwesomeIcon icon={['far', 'comment']} />{' '}
            {numeral(replies ? replies.length : 0).format('0a')}
          </Button>
          <Button
            className={'retweet'}
            variant={'link'}
            active={hasUserRetweeted}
            onClick={e =>
              toggleBooleanField('user.retweets', e, hasUserRetweeted)
            }
          >
            <FontAwesomeIcon icon={faRetweet} />{' '}
            {numeral(retweetCount).format('0a')}
          </Button>
          <Button
            className={'favorite'}
            variant={'link'}
            active={hasUserFavorited}
            onClick={e =>
              toggleBooleanField('user.favorites', e, hasUserFavorited)
            }
          >
            <FontAwesomeIcon icon={['far', 'heart']} />{' '}
            {numeral(favoriteCount).format('0a')}
          </Button>
          <Button className={'dm'} variant={'link'}>
            <FontAwesomeIcon icon={['far', 'envelope']} />
          </Button>
          <Link
            to={{
              pathname: `/${
                _.isArray(tweet['tweet.user'])
                  ? _.first(tweet['tweet.user'])['user.screenName']
                  : tweet['tweet.user']['user.screenName']
              }/status/${tweet.uid.toString()}`,
            }}
          >
            <Button className={'details'} variant={'link'}>
              <FontAwesomeIcon icon={['far', 'arrow-alt-circle-right']} />{' '}
            </Button>
          </Link>
          {debugElement}
        </ButtonGroup>
      </Card.Body>
    </Card>
  );
};

export default TweetCard;
As we saw in the Tweet List component the TweetCard component is one of the few components we are passing direct props to – in this case, the Tweet instance to be displayed. The component logic starts with a few useState() hooks before the useEffect() hook that retrieves all replies to the current Tweet. This is a good example of how useEffect(), which occurs at least once after render, can be used for asynchronous data retrieval. Here we’re using the Tweet.getReplies query which looks for tweet nodes in which tweet.inReplyToStatusId is set to the current Tweet uid. In other words, it finds all tweets that were replies to this one.
query find($id: string) {
  data(func: has(tweet.text)) {
    tweets: @filter(uid_in(tweet.inReplyToStatusId, $id)) {
      uid
      expand(_all_) {
        uid
        expand(_all_)
      }
    }
  }
}
After executing the query we set the local replies state via the setReplies function.
The hasAuthUserReplied() function determines if the currently authorized user is among the set of users that replied to this tweet. Just like the actual Twitter, this value is used to change the highlighting on the reply <Button> element.
We’ve also specified a number of local state hooks to track and update the favorite and retweet status buttons. For example, within a useEffect hook we get the current retweets collection by getting the reverse edge values of tweet['~user.retweets']. We then call the setHasUserRetweeted() hook function and determine if the current authenticated user has retweeted the given tweet by checking for a matching uid within the retweets collection. We then use the setRetweetCount() hook function to set the retweet count. All of these local state values are used in the rendered JSX.
The toggleBooleanField() function is a helper that makes it possible for the user to toggle certain tweet flags when interacting with the UI. In this case, if the user wants to favorite a tweet they click on the favorite <Button>, which triggers the toggleBooleanField function for the corresponding user.favorites property. Depending on what the newly-toggled value is we then await a User.insert() or User.delete() call, passing the authUser.uid as the primary uid and setting the passed property parameter equal to the secondary tweet.uid value. The BaseModel.delete() method provides helpers for performing advanced deletions via BaseModelDeletionModes, but in this case we’re just passing raw JSON.
Here’s an example of the kind of JSON that will be produced and sent to Dgraph.
{
  "uid": "0x30ca9",
  "user.retweets": [
    {
      "uid": "0x31fa4"
    }
  ]
}
When performing an insert (i.e. a mutation) GraphQL+- will lookup the parent node by uid, which is the User node in this case. It will then add the secondary uid of the Tweet to the user.retweets edge collection. This is similar to how a relational database handles foreign key references.
On the flipside, when performing a delete GraphQL+- interprets the same JSON above as an indication that the matching secondary Tweet uid should be removed from the user.retweets edge collection of the parent User node.
The toggleBooleanField() function ends by dispatching a TOGGLE_TWEET_PROPERTY action, passing the relevant information like the tweet and user that are being toggled. Critically, we’re also passing the reverse edge of the predicate here. This is because the original predicate is tied to the User instance, but the TOGGLE_TWEET_PROPERTY reducer function modifies the Tweet instance.
case ActionType.TOGGLE_TWEET_PROPERTY: {
  const isEnabled = action.payload.isEnabled;
  const property = action.payload.property;
  const tweet = action.payload.tweet;
  const user = action.payload.user;

  const clone = _.clone(tweet);

  if (!_.has(clone, property)) {
    clone[property] = [];
  } else if (!_.isArray(clone[property])) {
    clone[property] = [clone[property]];
  }
  if (isEnabled) {
    clone[property].push(user);
  } else {
    clone[property] = _.reject(
      clone[property],
      other =>
        new Uid(other.uid).toString() === new Uid(user.uid).toString()
    );
  }

  return {
    ...state,
    tweets: _.map(state.tweets, original => {
      return original.uid.toString() === tweet.uid.toString()
        ? clone
        : original;
    })
  };
}
It’s critical that reducers never mutate the state directly – instead, they should only return updated state objects. Therefore, we start by cloning the tweet instance, then perform a couple checks to ensure we’re dealing with an array. We then update the Tweet clone’s property by either adding or removing the new User instance from the collection. Finally, the returned state.tweets object is a mapping containing all the existing tweets, except that we insert the modified clone.
The rendered HTML for the TweetCard is fairly self-explanatory. We’re using some FontAwesome icons for the buttons, but most of the component logic occurs in the functions above and the useEffect() hook we already explored. The Tweet component is also rendered at the top of this card and the current tweet value is passed as a prop to it.
Tweet
The Tweet component displays the actual tweet text, #hashtags, @mentions, the user info, and the creation timestamp.
// File: client/src/components/Tweet/Tweet.tsx
// Layout
import './Tweet.css';
import { Image } from 'react-bootstrap';
// Libs
import moment from 'moment';
import React from 'react';
import * as twitter from 'twitter-text';
import ReactHtmlParser from 'react-html-parser';

const Tweet = props => {
  const tweet = props.tweet;
  const user = tweet['tweet.user'];
  const name = user['user.name'];
  const screenName = user['user.screenName'];

  const tweetLinks = twitter.autoLink(tweet['tweet.text'], {
    hashtagUrlBase: '/search?q=%23',
    listUrlBase: '/',
    usernameUrlBase: '/',
  });

  return (
    <>
      <div className={'tweet-header'}>
        <ul>
          <li>
            <a href={`/${screenName}`} title={name}>
              <Image
                className={'avatar'}
                src={user && user['user.avatar'] ? user['user.avatar'] : ''}
              />
            </a>
          </li>
          <li>
            <span>
              <a href={`/${screenName}`}>
                <b>{name}</b>
              </a>
            </span>
          </li>
          <li>
            <a href={`/${screenName}`}>
              <span>@{screenName}</span>
            </a>
          </li>
          <li>
            <span className={'createdAt'}>
              {moment(tweet['tweet.createdAt']).fromNow()}
            </span>
          </li>
        </ul>
      </div>
      <div className={'tweet'}>
        <p>{ReactHtmlParser(tweetLinks)}</p>
      </div>
    </>
  );
};

export default Tweet;
We’re using the Twitter Text library provided by Twitter to help with parsing the tweet text. In this case, the autoLink() function detects where entities like hashtags and mentions are within the tweet, and surrounds those elements with appropriate <a> tags. By passing some extra options to the function call we can override the defaults so our search URL is local, rather than linking to twitter.com.
Tweet Modal
The final tweet component to look at is the TweetModal component. As the name suggests, this component creates a modal popup overlay that contains a single Tweet. As such, it illustrates the power of reusable components, since it renders the TweetCard (which itself renders the Tweet component).
// File: client/src/components/Tweet/TweetModal.tsx
import React, { useEffect, useState } from 'react';
import { Button, Modal } from 'react-bootstrap';
import { DgraphQueryExecutor, Queries } from 'dgraph-query-manager';
import TweetCard from './TweetCard';
import { useStateContext } from '../../state';
import * as _ from 'lodash';
import { logger } from '../../helpers/logger';

const TweetModal = ({ match }) => {
  const [{ tweets }] = useStateContext();
  const [isShowing, setIsShowing] = useState(true);
  const [uid, setUid] = useState(undefined);
  const [tweet, setTweet] = useState(undefined);
  const passedUid = match.params.tweetUid;

  // Update when passed Uid differs from state.
  if (uid !== passedUid) {
    setIsShowing(true);
    setUid(passedUid);
  }

  const onHide = () => {
    setIsShowing(false);
  };

  useEffect(() => {
    // Attempt to retrieve Tweet from local state collection.
    setTweet(_.find(tweets, obj => obj.uid.toString() === uid));
    const executor = new DgraphQueryExecutor(Queries.Tweet.find, {
      $id: uid,
    });
    // If Tweet not in state, retrieve from database.
    if (!tweet) {
      executor
        .execute()
        .then(serialization => {
          if (serialization.success) {
            setTweet(serialization.response);
          }
        })
        .catch(exception => {
          logger.error(exception);
        });
    }
  }, [tweet, tweets, uid]);

  return (
    <Modal show={isShowing} onHide={onHide}>
      <Modal.Header closeButton />
      <Modal.Body>
        <TweetCard tweet={tweet} />
      </Modal.Body>
      <Modal.Footer>
        <Button onClick={onHide}>Close</Button>
      </Modal.Footer>
    </Modal>
  );
};

export default TweetModal;
As you may recall from the Routing with React Router DOM section, the Main component contains a Route that references the TweetModal component.
<Route path={'/status/:tweetUid'} component={TweetModal} />
This routeing path mimics the path that Twitter uses for singular tweet URLs, so the TweetModal component will only render when the user is looking at a single tweet.
The logic we’re using here is to grab the tweetUid param from the match object provided by react-router-dom and set it to local uid state. From there a new DgraphQueryExecutor is passed that tweet’s uid and it uses the Tweet.find Query to see if the uid exists in the Dgraph database. Here’s what that query looks like.
query find($id: string) {
  data(func: uid($id)) {
    uid
    expand(_all_) {
      uid
      expand(_all_)
    }
  }
}
In the event that a response is provided the modal is set to show and the retrieved Tweet instance is passed as a prop to the rendered TweetCard component, which behaves just as we saw above.
It’s worth noting that we’re using the useDgraphLocal() custom hook here, which is somewhat similar to the useDgraphGlobal() hook, with the major difference being it stores state locally, not globally.
// File: client/src/hooks/dgraph/useDgraphLocal.ts
// Helpers
import { logger } from '../../helpers';
// Libs
import { useEffect, useState } from 'react';
import { DgraphQueryExecutor } from 'dgraph-query-manager';

/**
 * Custom React hook that performs the heavy lifting of data retrieval
 * from Dgraph and uses local state.  Accepts a DgraphQueryExecutor that is
 * executed, the response of which is assigned to state.
 *
 * @param parameters.executor Executor to be executed.
 * @param parameters.dependencies Values that will trigger a re-render upon change.
 * @param parameters.allowFailure Allows failed result to still be dispatched to state.
 */
export const useDgraphLocal = (parameters: {
  executor: DgraphQueryExecutor;
  dependencies: any;
  allowFailure?: boolean;
}): [boolean, any] => {
  const { executor, dependencies, allowFailure = false } = parameters;
  const [isLoading, setIsLoading]: [boolean, Function] = useState(true);
  const [response, setResponse]: [any, Function] = useState(undefined);

  useEffect(() => {
    setIsLoading(true);
    executor
      .execute()
      .then(serialization => {
        setIsLoading(false);
        if (serialization.success || allowFailure) {
          setResponse(serialization.response);
        }
      })
      .catch(exception => {
        logger.error(exception);
        setIsLoading(false);
      });
  }, dependencies);

  return [isLoading, response];
};
Other than that, it behaves much the same, allowing the TweetModal component to perform a post-render effect to asynchronously retrieve Dgraph data and use the response for further processing.
Next Steps
Whew! That was quite a lot to cover throughout this guide, but hopefully, this series helped to illustrate how any type of app – from this relatively simple dgraph-twitter-clone to a large-scale, distributed system – can realize significant benefits by integrating with a graph database like Dgraph.
In Schema we explored how Dgraph’s schema specification makes it easy to design complex data structures without the need to define (or even know about) explicit relationships. This flexibility allows your data layer to be dynamically expanded and mutate to the needs of the application over time. In fact, Dgraph has no problem accepting data with unknown predicates and automatically adding them to the schema for future use! Check out the Schema documentation for more details.
In the Creating a Search Component section we also explored how Dgraph’s GraphQL+- makes it easy to execute performant joins and reverse joins across any shape of data. With features like reverse edges, powerful indexing, filter logic, query and value variables, GroupBy, and much more, Dgraph eliminates many of the potential headaches found when trying to perform complex joins across large datasets within traditional SQL-like databases. Head over to the Query Language documentation to get tons more info on GraphQL+- and how it can streamline your data layer.
There’s plenty more to learn about how Dgraph can benefit your team and your next project, so check out some of the benefits, see how to get started, take our interactive tour, chat with us on our discussion forums, or even throw us a star on GitHub if you’re so inclined. If you’re ready to get more direct support and see how Dgraph engineers can help you, check out our Startup and Enterprise Support plans or get in touch directly.